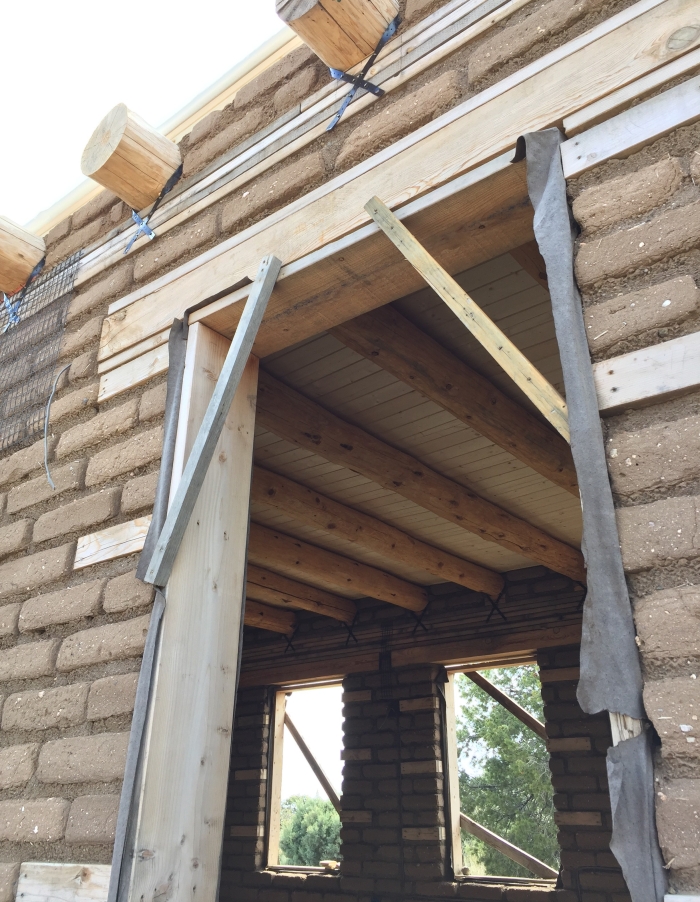
Earlier this week we completed the installation of our tongue and groove ceiling above the vigas. A multitude of T&G boards were involved in the installation. I believe we used 230 individual 1x6x16′ boards in all. The finished ceiling presents a grid of prominent vigas supporting a backdrop of clean and orderly tongue and groove boards that run perpendicular to the vigas throughout the long house.


My plan when we initially started the T&G install was to strive to do as little work to the vigas as possible while not making it too hard on ourselves to fit the T&G boards together. I also wasn’t sure how many vigas each board would be able to span, given the natural irregularities in the viga surfaces. I had hoped that we wouldn’t have to make too many cuts on the 16′ boards, but it was hard to predict how flexible the T&G boards would be. I was fine with the T&G ceiling gradually rising and falling over high and low spots on vigas and across the slight differences in heights from one viga to the next.
The installation went much smoother than I could have hoped for. We ended up being able to span vigas with full 16′ boards, and we never had to cut any T&G boards in order to get them to fit together over the funkier vigas. There was almost no additional work that needed to be done to the vigas – I think I only had to use the electric planer on two of them. The T&G boards also fit together really easily. Sure, some took more finagling than others, but we generally had little frustration getting the boards to come together tightly.


After we’d finish installing boards for the week, we’d staple down a layer of roofing felt and cover the finished area with a temporary polyethylene cover (eventually, we will install a permanent polyethylene vapor barrier as the trusses go up). Given that recent weeks have been wetter than normal and the spring winds are starting to pick up, we had our fair share of frustrations trying to keep the boards covered and dry. Through our efforts, we’ve successfully been able to prevent any weathering or damage to the T&G boards.

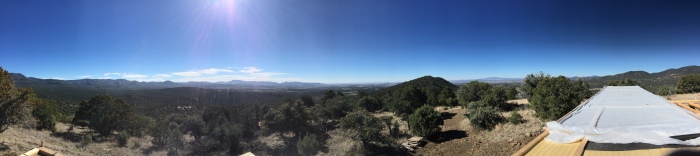
I am able to more fully realize the interior spaces within the house now that we finally have a top on the house for the first time. With the ceiling on there is an increased sense of enclosure, and coming into the house feels like going inside. No longer does the ample New Mexico sunlight pour through between the vigas. To my surprise, and perhaps counterintuitively, the interior space seems to feel bigger with the ceiling in place.

Now that the ceiling is in place, we’ll be assisting the electrician with some wiring prior to putting the roof trusses up. Wiring above the ceiling will obviously be much easier before all the roof members are in the way. Once the wiring is completed we’ll begin installing the trusses.

Anne here. It’s wonderful to see all your planning work out the way you hoped it would. And, exciting to see the closed in spaces. Being sheltered from the weather is a big deal. Best to Megan and Leo, as well.
LikeLike
Great idea even if it is a lot of work. Could you roll on felt paper and tack it as soon as the TG is up?
LikeLike
Hi Edward, Yes, that was how we did it, although we’d usually wait until we finished an entire row of T&G. That way, we’d be able to cover it with the plastic layer as well. It definitely helped keep the sun off the wood and kept it from drying out too fast. Sometimes the T&G would be uncovered for a day or so, but usually not more than that. It wasn’t a totally waterproof solution, so we still had some issues when it’d rain or snow. We had to remove the felt and plastic layers after a storm to let sections dry out completely before being covered over again. But yeah, it worked pretty well for the most part. Thanks for your question!
LikeLike
I really enjoyed going through all the different phases of your build. I’m actually building an adobe house in North Phoenix as well. My plans call out for steel lintels but I’m considering timber instead. I didn’t see a section regarding the lintels that you used so I thought I’d reach out. Can you provide any information on this? Thank you, Aaron
LikeLike
Hi Aaron, thanks so much for checking out our project! One of these days (soon) I’ll upload some new content!
I would definitely recommend going with wood lintels if you think you might want to leave them exposed. It’s a really great look. Mine are 6″ x 10″ pine, harvested from the Gila Forest and milled by a local lumber mill in Riverside, NM.
In New Mexico, we have an earthen building code, which specifies the necessary lintel dimensions and how much wall bearing is required. Although you’d be under a different code in Arizona, you may find the NM code to be informative: http://164.64.110.134/parts/title14/14.007.0004.html.
Let me know if you have any additional questions on this subject, or any other! Thanks again for your interest in what we’re doing! I wish you all the best as you build your house!
LikeLike