Finishing the First Floor Layer
We worked long days during the first few weeks of December to finish the base layer of earthen floor, room by room. After pouring the first three rooms, we ran out of screened clay. From that point on, one person would screen clay while the other made the floor mix. We’d screed the floor together every 5-6 loads. Most days, we would finish up just after sunset in the waning twilight. These were long days of constant work. We completed the final room, the living room, on the Friday before Christmas, and we took a couple of (much needed) weeks off.


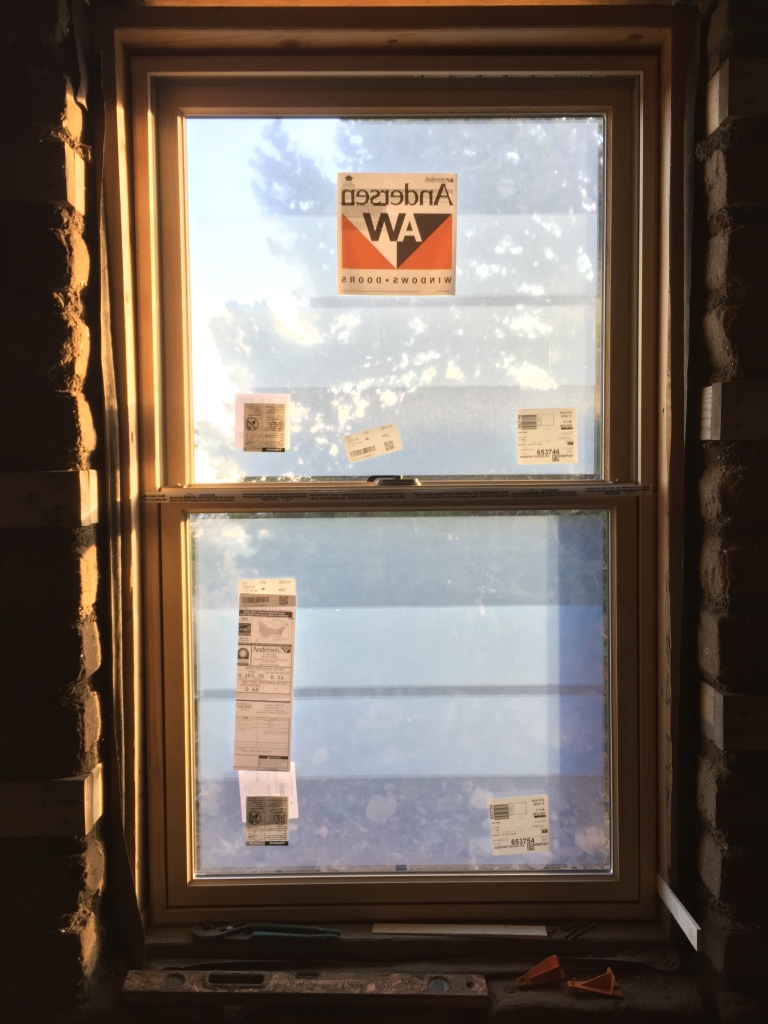
The floors have been drying quite slowly, given the low temperatures and the occasional snowfall. About midway through the floor-pouring process we installed the windows, which allowed us to keep the indoor temperature a little higher during the cold nights. Unfortunately, this also had the effect of reducing airflow in the house and extending the drying time, however, it’s more important to prevent the floors from freezing until they have dried sufficiently. After a month of drying, the floors are feeling fairly solid, but they’re still not totally dry yet.

Although the floors are drying slowly, this gradual drying process does have it’s advantages. For example, we’ve had almost no cracking thus far. If there are spots that need to be touched up with a trowel, it’s nice that the floor is workable for an extended period of time. I suppose those are the only advantages. Mostly, it has been a bit of a hindrance to not have complete access everywhere in the house, particularly as there are lots of other things to get done inside.

Plastering Our First Two Rooms
Following our two week respite at the end of December, we flipped the calendar to 2020 and began our first layer of earthen plaster. After having worked with a four inch thick base layer of floor for so many weeks, a half inch layer of plaster seemed much less daunting. However, every room has one floor, but four walls. This will still be a long process.
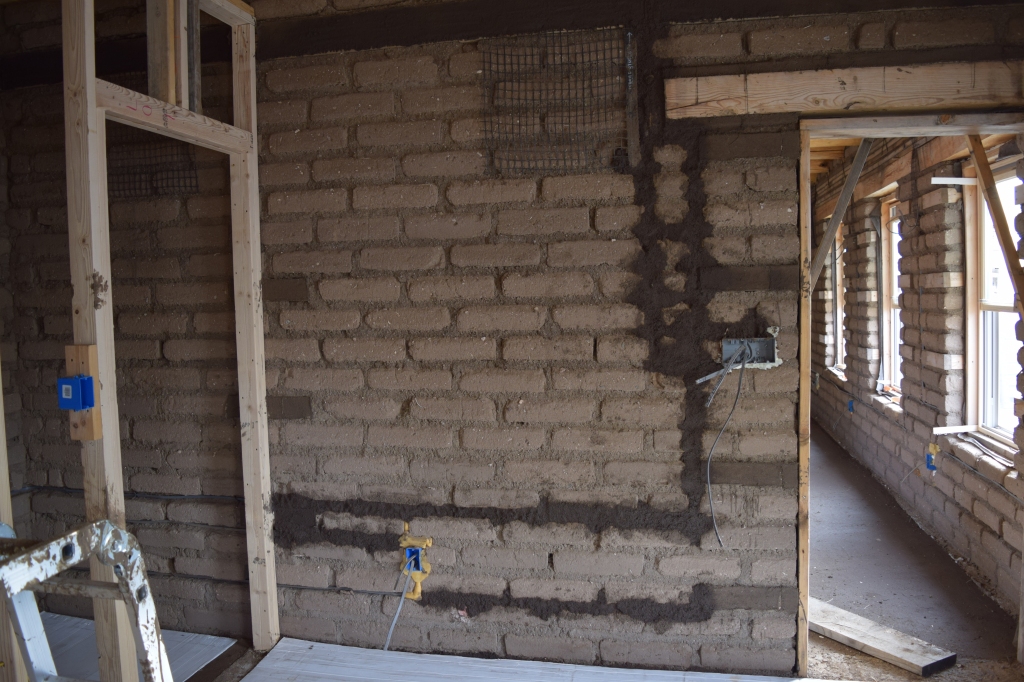
The walls in each room require some preparation before we are able to begin plastering. Our preparations include filling in the electrical wire channels, tightening the geo-grid, and covering the gringo blocks and wooden bond beam. These preparations take a significant amount of time, but they make the plastering process go much smoother (no pun intended).


Our earthen plaster mix is sandier than our floor mix and has no straw. Through trial and error, we’ve found that a fairly dry mix seems to be easier to use, which is somewhat counterintuitive. We start by getting the plaster on the wall with our hands and then use magnesium floats to smooth it out. We work our way up from the bottom of the wall in roughly four foot wide sections. Working the plaster around the windows and at the top of the wall takes time and more than a little patience.

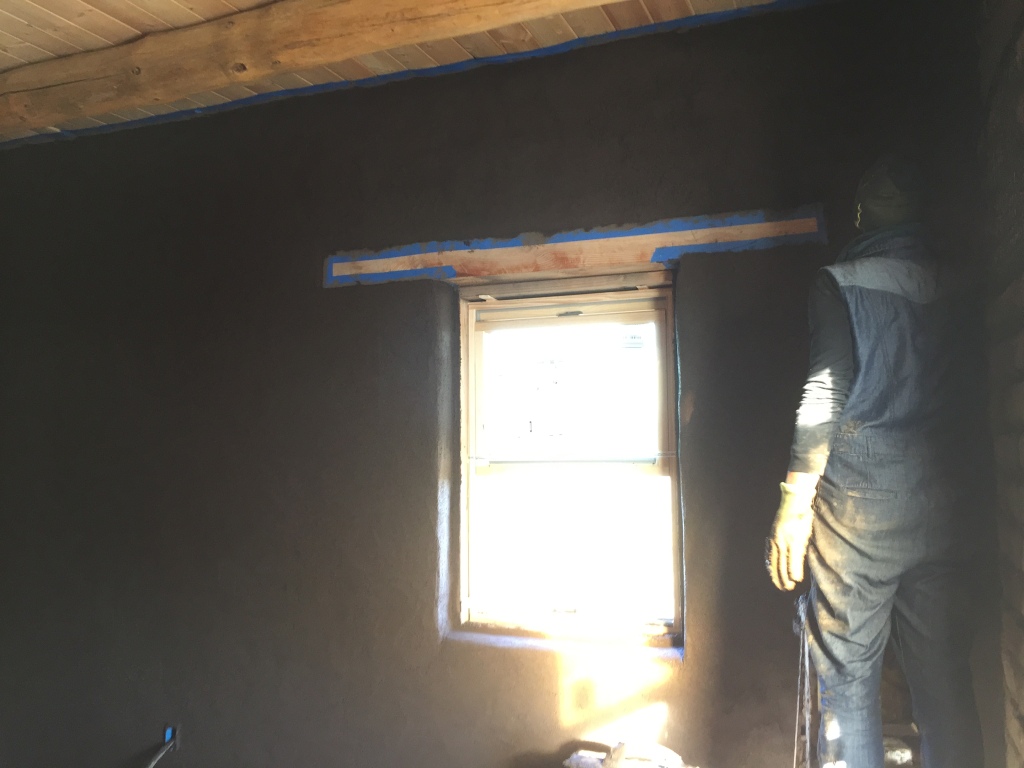
We are able to complete one wall in a day. The walls dry out significantly quicker than the floors, since the plaster is a much thinner layer. We’ve now plastered one-and-a-half rooms. I’ve been pleased with the results, and we keep getting better. We’ll likely be plastering for the next few months!

Ahhhhhhhhhhh!!!!!! This step is so so exciting you guys! I know, all of the steps have been really substantial, but it’s looking so sharp. Great work and congratulations thus far! Sending all our love, patience and zen plaster mindfulness!
Hugs!
On Sat, Feb 8, 2020 at 1:29 PM Vision creation adobe wrote:
> visioncreationadobe posted: ” Finishing the First Floor Layer We worked > long days during the first few weeks of December to finish the base layer > of earthen floor, room by room. After pouring the first three rooms, we ran > out of screened clay. From that point on, one person would ” >
LikeLike
Hi Alicia! Yes, you’re definitely right that getting a layer of plaster up really starts to give the interior a new level of completion. It has been really striking to look around and just see all these homogeneous planes of mud! Thanks so much for checking out the post! We hope you guys are well!
LikeLike
Everything is looking exceptionally nice ! Question, what if any material did you use on any curved/rounded interior surfaces such as window/door openings for plaster to adhere to, metal lathe or bamboo mat or burlap or was it straight mud to wall ?
LikeLike
Hi Benjamin, we haven’t been using any supplemental materials around corners, as it hasn’t seemed necessary. We’re getting a really strong bond in these areas. Sometimes we have to fill in with adobe mud a little beforehand to even out the edges before we start plastering. We do put burlap over our gringo blocks, which has been working fairly effectively.
Thanks for reading!
LikeLike
Hi Benjamin, I just wanted to amend my earlier comment regarding the curved interior surfaces. We actually have started to use metal lathe for the curved edges around the windows. The reason we made this change was that I was originally planning to add wood trim over the rough buck wood around the sides of the windows and have the plaster meet the trim. I decided that it would be easier to have the plaster cover the rough buck wood instead, so I felt that roofing felt over the rough buck and then metal lathe would be the best way to achieve this and minimize chance of cracking. We did our first test of this method at the end of last week, so I’m waiting to see how the plaster looks once it is dry.
From the windows we already did, I still don’t feel that metal lathe was needed if the plaster is stopping when it hits the wood rough buck. Only time will tell if the plaster ends up cracking with the opening and closing of the windows, but the plaster seems to do just fine around the windows at this point. I should note that on these windows I wasn’t going for a super rounded, uniform look (in which case metal lathe would be helpful). I had been aiming for a modest curve that allowed for a more rustic reveal of the adobe non-uniformity. You can probably see what I’m talking about in the photos included in the post above.
Anyways, just wanted to provide this update. Hope that helps!
LikeLike