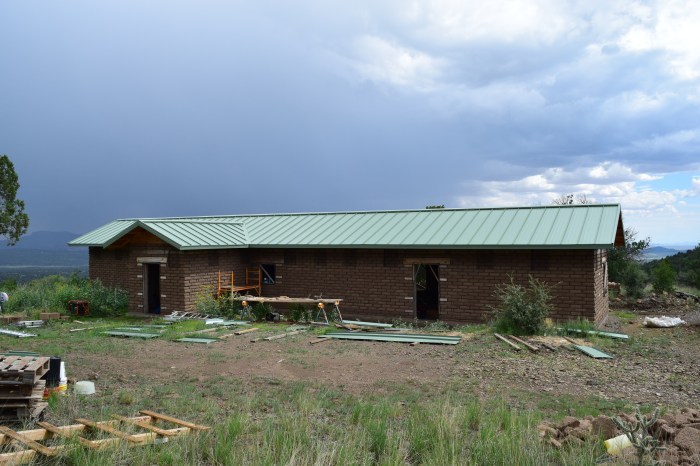
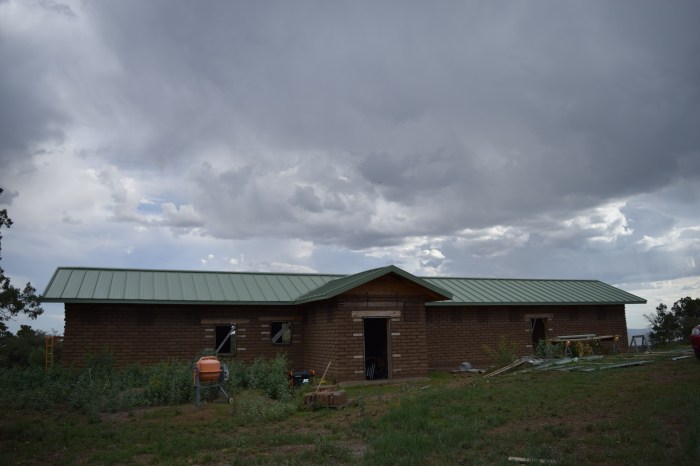
There’s nothing like putting the finishing touches on your roof! Not only is it a relief to finally have the house fully and permanently protected from rain and snowfall, but the finished metal roof is also a final visual layer of the house. At this point in construction, very little of what we have done has been the finished layer – most elements will be further refined, plastered, or covered up. The metal roof panels, however, will remain visible in all their colorful, vibrant glory!
As mentioned in the previous post, we went with MasterCraft Metals for our standing seam roof panels. Standing seam roofs provide the best long-term house protection when compared with other roofing systems (metal and non-metal), as all of the screws used to secure the panels are completely covered and remain unexposed to the elements. It’s a really well-designed system that, when installed properly, should last a lifetime.

Installing the roof panels was a mostly straight-forward process, although there are a number of tedious steps throughout. The panels require some cuts and bends to be made at the top of each panel. The panel is then placed atop the roof and secured to the OSB sheathing with metal clips that hook over the standing seam on one side of the panel. More cuts and a bend are then required at the bottom of the panel where the end hangs over the roof. Finally, a crimping tool is used to seal the current panel over the previous one.


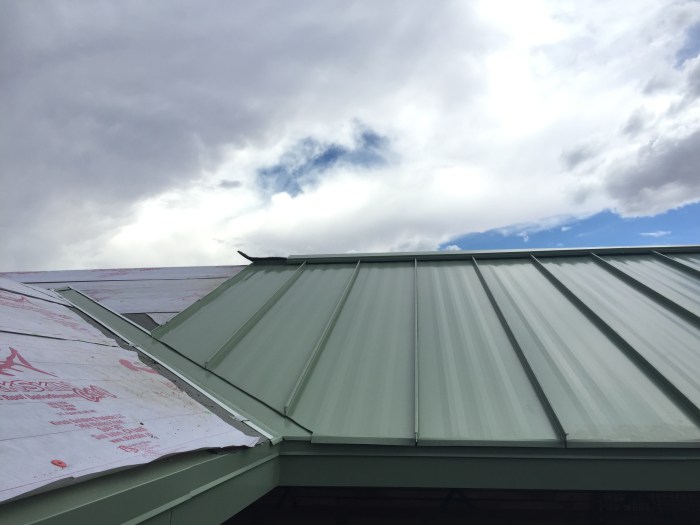
That process is repeated many, many times, as each panel is 20″ wide. Since our roof is a gable roof, we had two sides of the roof to do. Our process was to do 10 feet of panels on one side of the roof, and then do the same 10 feet on the other side of the roof. At that point we would install the vented ridge cap. A vented ridge cap allows air to enter and escape through the peak of the roof along the entire length of the house. This is helpful in allowing air circulation in the attic space, which helps prevent condensation issues.


Installing the ridge cap on a standing seam roof is not that much fun – a vented ridge cap is even less fun. First, a 10 foot section of ridge cap is brought up on the roof and set temporarily in place. Marks are made where the ridge cap will sit on each standing seam. The ridge cap is then taken back down and notches are cut out so it can sit on the seams. A product called Cobra Vent is then put down along the vent at the peak, which helps keep rodents and birds from getting into the attic space. The ridge cap is then put into place and secured to the seams with screws. There are some additional steps at the ends of the house, but I don’t even feel like going into it here!

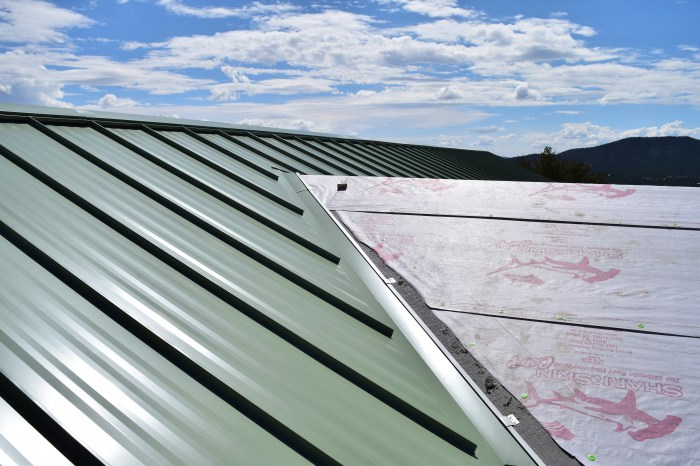
Putting up the roof panels goes relatively quickly once you get going. You want to make sure that you square up the panels to start, but then you just keep adding panels and get into the rhythm. The ridge cap slows you down, but the slowest part is dealing with any hips or valleys. Our house has two valleys in the roof. There are quite a number of steps in putting the metal up where the panels encounter the valleys. The panels hook into the valley at an angle, so the panels need to be cut and bent accordingly. The end result is a nice, clean look, but it’s quite a lot of work.
We’ve had a pretty active monsoon season this year, particularly from up on our hilltop. There are probably better times of the year to install a metal roof, but we dealt with some rain-shortened days and avoided the lightening bolts. It was quite wonderful to put the very last piece of metal up on the roof, although a storm was overtaking us and things were a little rushed and tense.
A fellow owner-builder once told us that completing the roof is the half-way point of the build. It is a good time to reflect on all the work that has been done, and a good time to fight off any sense of complacency and get back to work. That being said, we feel so much gratitude to all the folks who have helped and supported us along the way. It’s improper to say you’re building a house yourself, as in most cases it is hardly a solitary venture. Thank you to everyone who has helped in one way or another – you know who you are!

