Although we started constructing the light straw-clay wall at the end of May, I am just getting around to writing about it now (October). It was a project that took the entire summer, and we are still working on finishing the plaster. For now, I will just provide a basic overview of the process, and I may provide a more detailed description later on.
A light straw-clay wall is a frame wall with an infill of straw dipped in a clay slip. The straw is not heavily compacted when it is placed in the wall, as the purpose of the wall is to raise the R-value. A lighter infill that is not heavily compacted has better insulation value. In our case, we wanted to boost the R-value of our north adobe wall without having to use a high-energy insulation material. Light straw-clay walls are an excellent, natural alternative for increasing the R-value of a natural home.
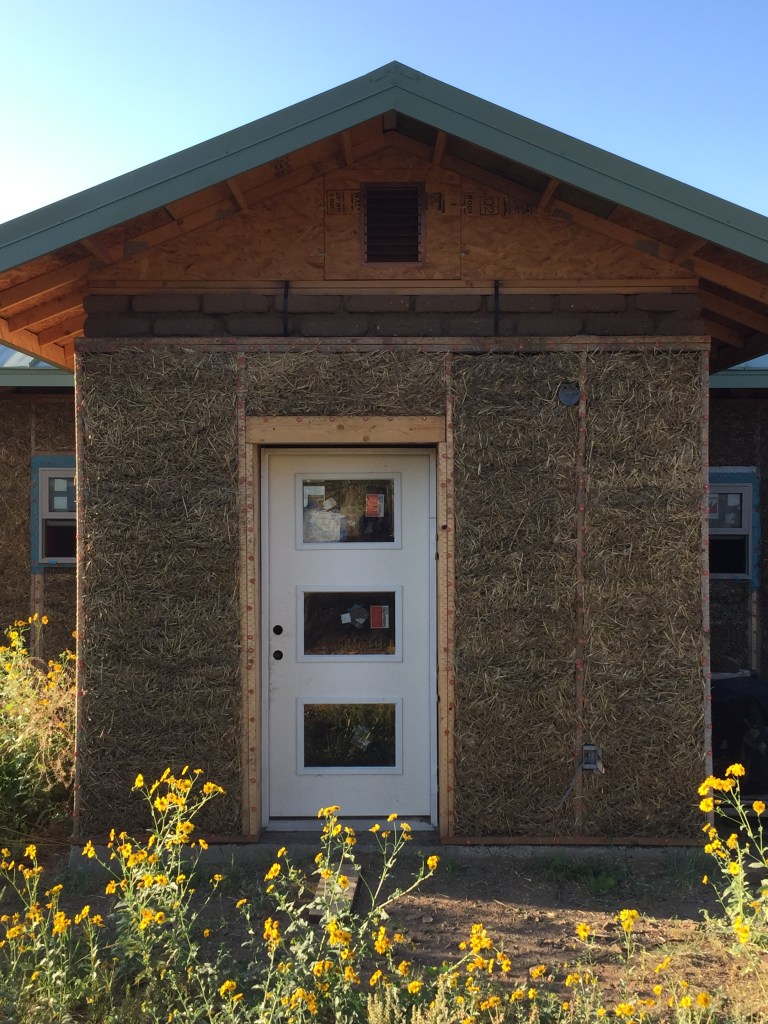
The main drawback of a light straw-clay wall is that it is very labor intensive to construct. The wall must be framed, the straw-clay must be put in, and the whole thing must be plastered. As I mentioned, this whole process has taken us from the end of May to the end of October. However, our wall is huge: It’s a 2×8 wall that is 8 feet high and 87 feet long. A shorter, less thick wall would be quicker and easier.
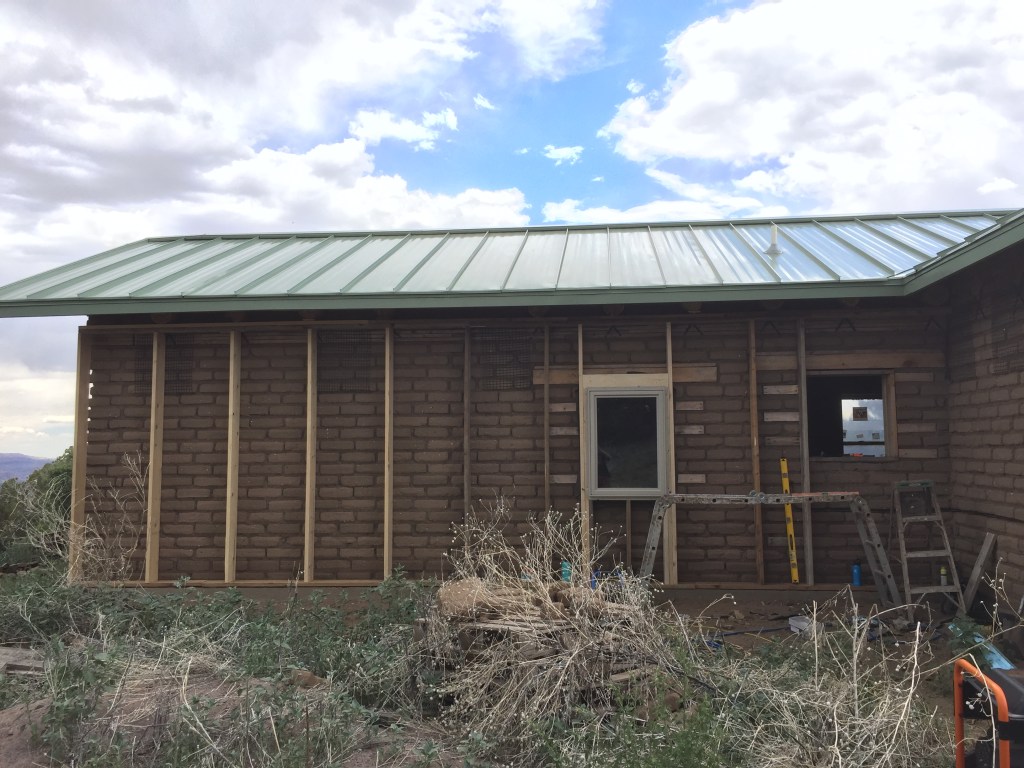
First, we constructed the frame wall. Fortunately, we were able to use the same 2×8 boards that we had used for our foundation forms. After sitting out for 2.5 years, it felt great to put them back to use! We spaced our studs at 32 inches on center, which is the maximum recommended spacing according to Appendix R of the International Residential Code. We used treated lumber for the bottom plate and created a double top plated with lapped joints.
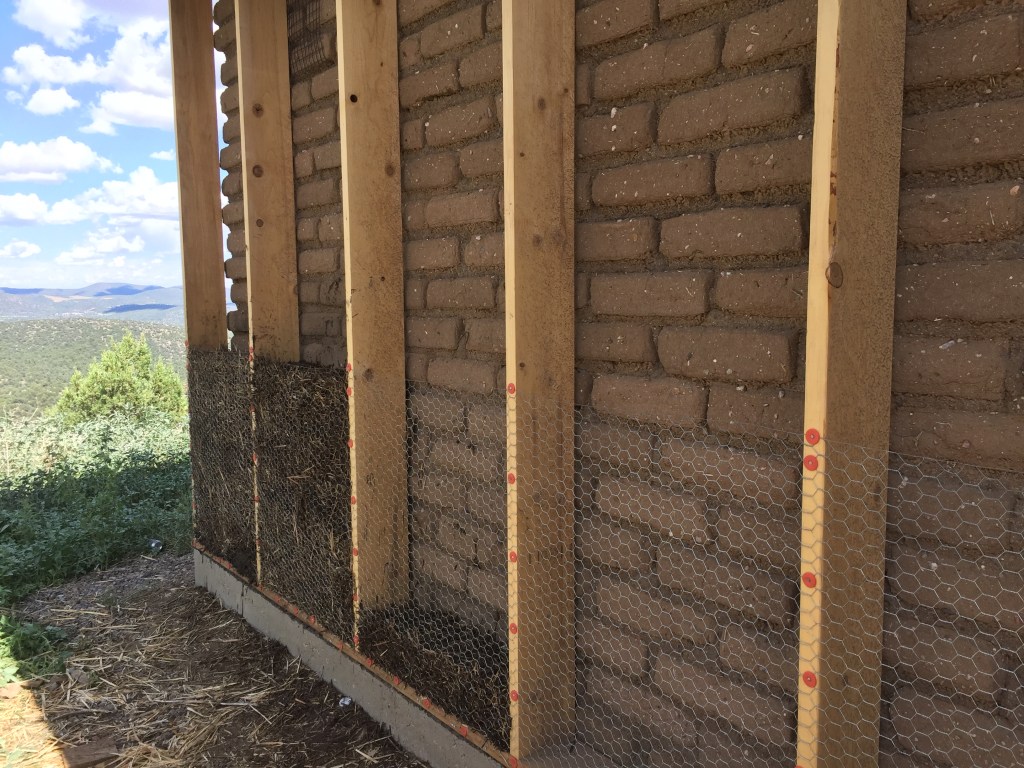

After the frame wall was finished, we nailed up a three feet high row of poultry wire along the bottom of the wall. We used plastic cap nails and staples, and we tried to get the poultry wire as tight as possible. Getting the wire tight was quite difficult. The tighter you can get it, the better, as it will make plastering easier later on. It will also increase the flatness of the wall.
The clay slip you need for coating the straw is essentially just clay mixed with water (we added a couple shovelfuls of sand, just for added volume). We screened our clay through a half-inch screen. We found that using an electric mixer was far more effective at blending the water and clay than mixing by hand in a wheelbarrow. We made the clay slip quite wet and loose. We found that a heavy cream consistency (or wetter) was best.
Once the clay slip was made, we’d fill a bucket from the wheelbarrow. We’d put out a couple piles of straw and pour the clay slip on our piles. Then, we’d mix our piles around by hand to try to coat the straw entirely. Sometimes you’d have to add more clay slip or more straw to get the consistency right and make sure all the straw was coated evenly. You don’t want to use too little or too much clay slip, but just enough to fully coat the straw.
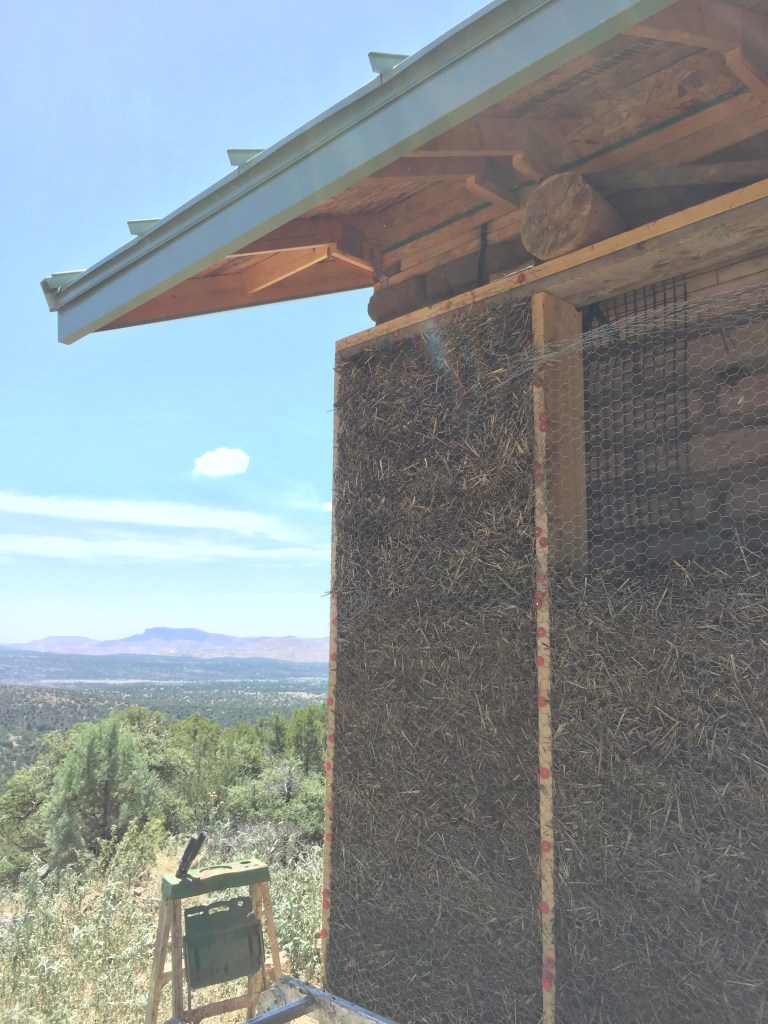
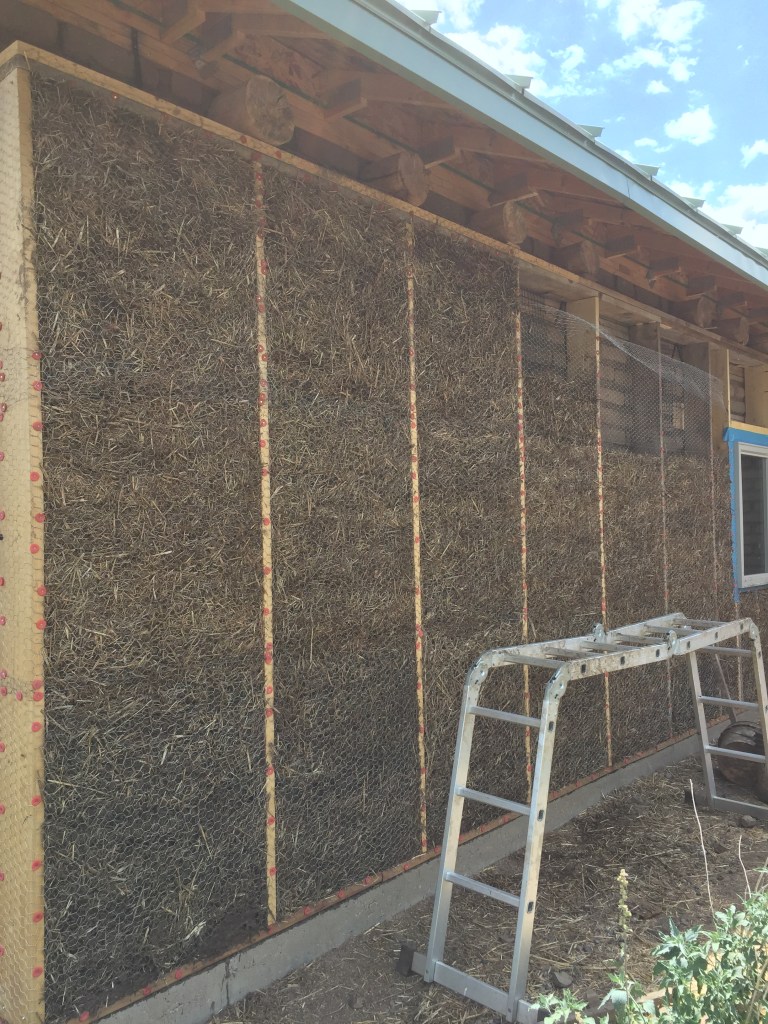
After that, we’d simply drop the straw-clay into the space between the studs in the wall. We’d compress the straw a bit with our hands or with a 2×4 board. Mainly, we just wanted to ensure that the straw was evenly spread around and there were no voids. The wall is called a light straw-clay wall, because you really don’t want to compress the straw-clay too much. You want it to be free of voids and stable, but to the best insulator it can be, you don’t want to compress it too much.
Once the first row of chicken wire had been filled, we’d put up another row above the finished one. Our walls took three rows of chicken wire, each being 3 feet high. The top of the wall is obviously the hardest, as it quickly becomes quite difficult to reach in and stuff the straw into the wall.

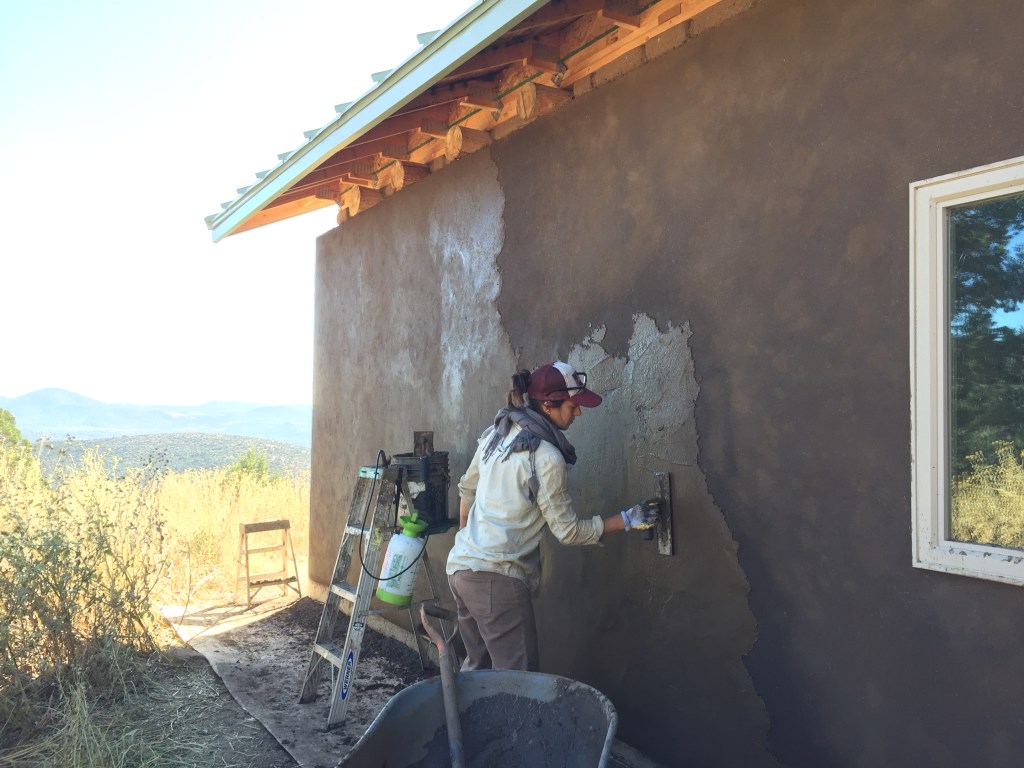
After light straw-clay had been added to the entire wall, it was time to put on the first coat of plaster. We added wheat paste and horse manure to this coat. The thickness of the plaster varied, depending on the shape of the wall and how flat the straw was against the wire, but it was probably somewhere around a 1/2″ thick. We didn’t try to make the wall too flat, but left some of the wall’s natural shape.
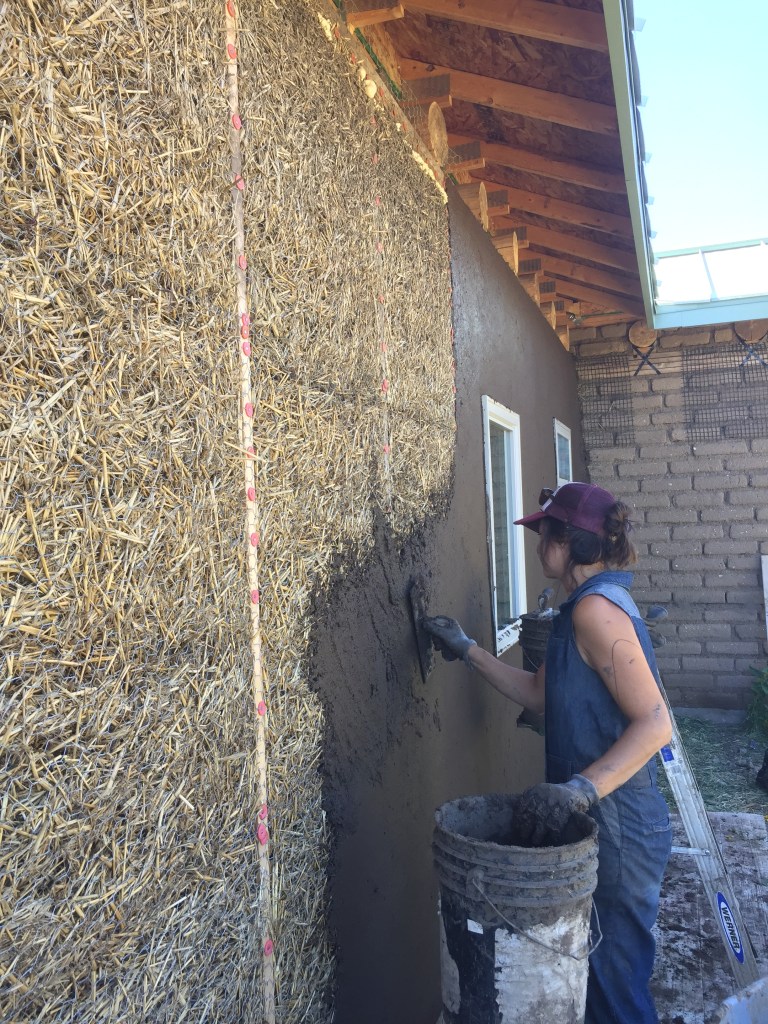

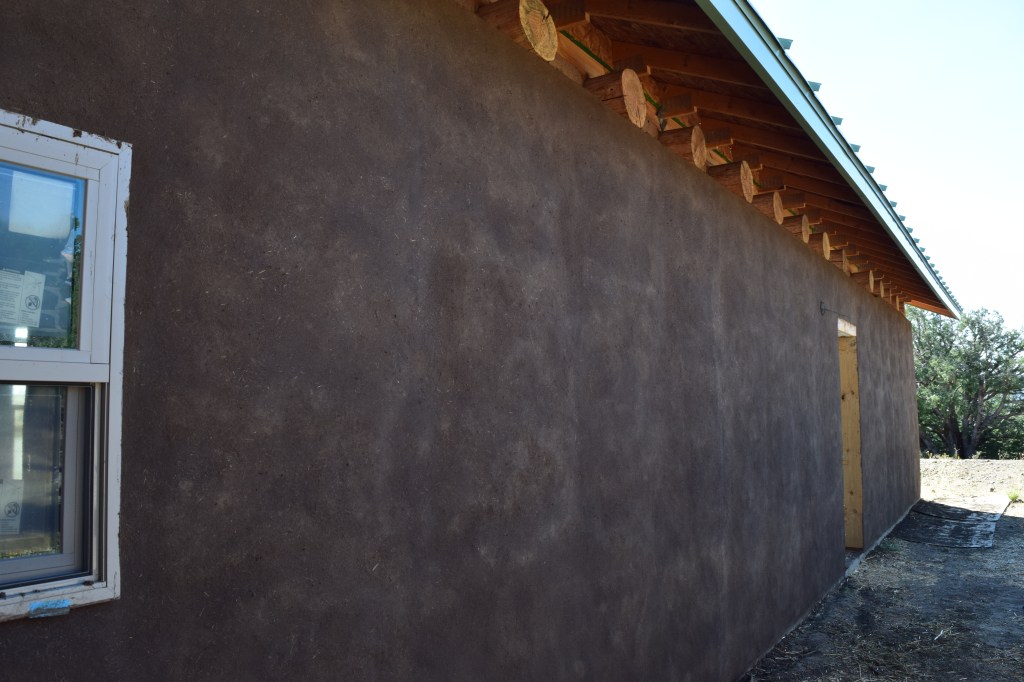
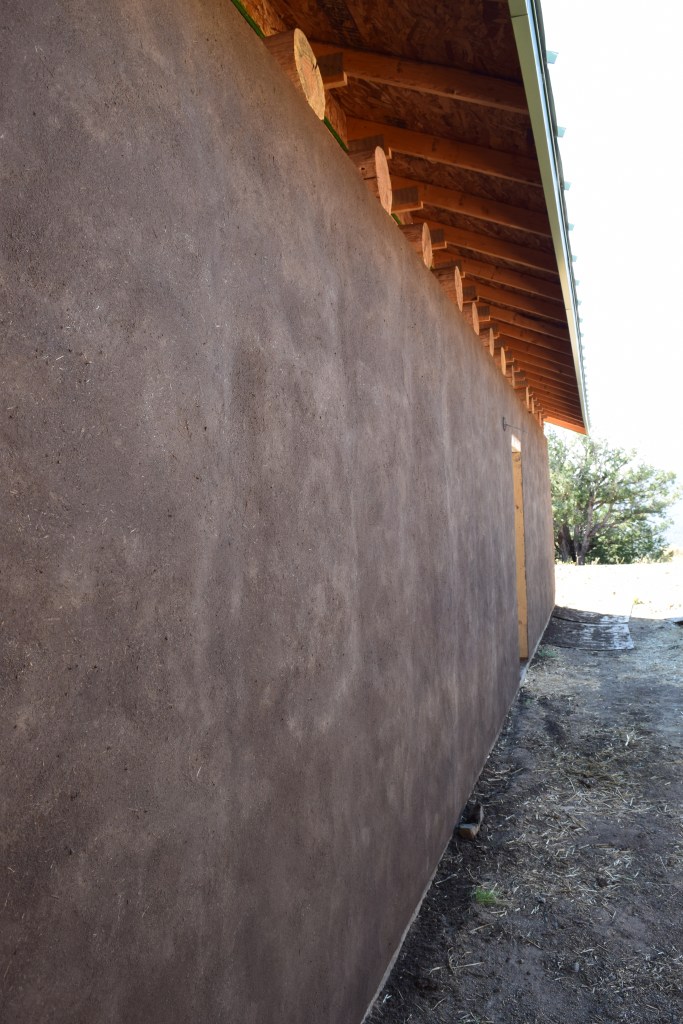
After we completed the base coat of plaster, we went right back and started adding a second coat. We are using basically the same plaster mix, but increased the straw and horse manure slightly for this coat. This second coat looks very similar to the first coat, but we are able to get it smoother and flatter. We screened our sand and clay down to an 1/8 inch. We also don’t have to fight with straw sticking out and getting in the way, like we did on the base coat, which made the base coat of plaster much harder to apply and trowel smooth. The second coat is going on much easier and I’m very pleased with the results so far!
Early next week, the plaster will get it’s first precipitation test. We’re supposed to get our first winter weather, with rain and (possibly) snow in the forecast. I’m excited to see how the plaster performs. Eventually, we’ll be adding a series of sodium silicate washes over the plaster to hopefully create an impermeable, glass-like layer over top. Kurt Gardella suggested this technique to me, as recommended by plasterer colleagues in Germany. We’re excited to try it out here in the American Southwest!
I’ll be sharing more info on that process, along with our results, in a future post. Stay tuned for more!

Looks freakn great, good job ! I have a long north wall I was planning to do the same. I know Kurt is all about breathability of adobes and the structure as a whole, but if sodium silicate is impermeable wouldn’t that cut out the ability of the walls to breathe ?? Idk, maybe I have it all backwards, just sounds counterintuitive ! Not familiar with this sodium silicate (?). Any enlightenment would be greatly appreciated !
LikeLike
Thanks Benjamin! Apparently, the chemical reaction between the sodium silicate and the plaster makes it more water resistant, but doesn’t reduce the breathability. I think it’s similar to a lime wash or lime plaster in that regard, but we’re not entirely sure of how it works on a chemical level.
Sodium silicate is also called potassium silicate or water glass. I bought a gallon from New Mexico Clay (here: https://nmclay.com/sodiumsil-gal-sodium-silicate-gallon). You can also find it on Amazon. Rutland sells some for sealing cement floors, but it’s the same thing.
I’ll try to provide more info in a future post once we’ve applied it to our walls. Thanks for your interest!
LikeLike
Hi. I’m looking for the same experience for a while.
Have plan to insulate existing masonry walls.
Could you share some feedback about this insulation behavior? moisture, mould?
thank you)
LikeLike
Hi Serg, the light straw-clay insulation wall seems to perform very well. I haven’t noticed any moisture or mold. The whole wall is covered in mud plaster, which is still intact, so I don’t believe there are any issues with precipitation getting inside the wall. Occasionally, we will get rain that really hits the plaster of the straw-clay wall. In those instances, the plaster does get saturated, but it dries and can pull the moisture back out. So yeah, I don’t think we’re having any issues with the insulation wall at all. I’d recommend it as a good natural insulation method!
LikeLike
Great! Thank you for quick response!
LikeLike