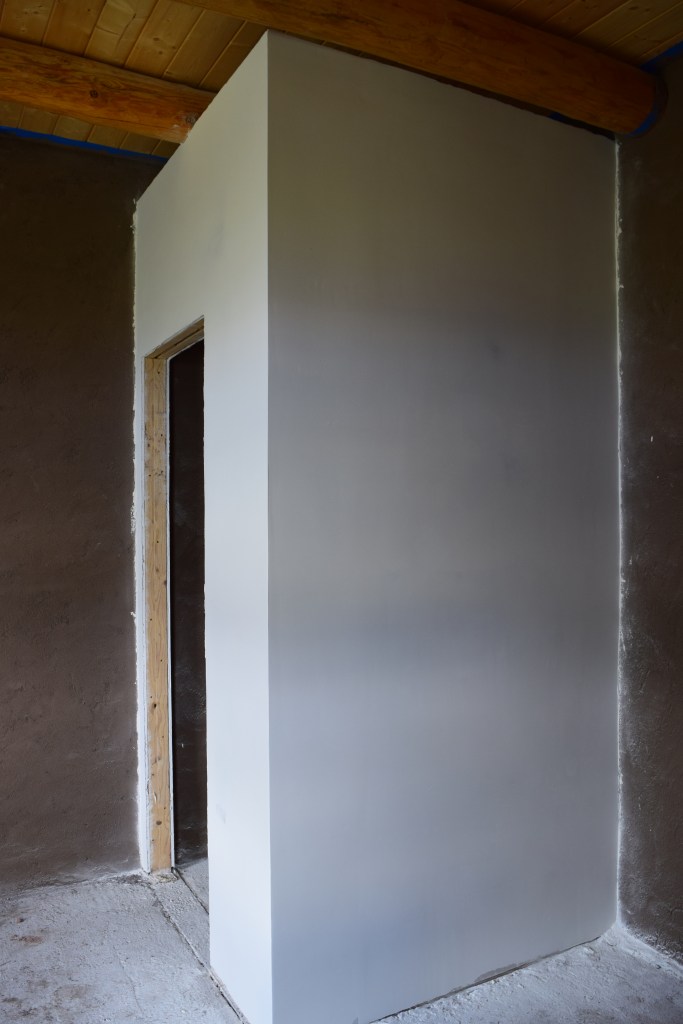
When we think about building an earthen home, we often don’t think about drywall installation. Most earthen homes, however, have at least a small amount of wood framed walls with drywall. These walls are usually interior walls. For example, all of the load-bearing walls in our house are made of adobe. This includes all of the exterior walls, as well as many of the interior walls. The closets, on the other hand, are wood framed walls with drywall. The partition wall between the bathroom and guestroom that houses all of the plumbing pipes is also a wood framed wall.
Although I wanted most of our interior walls to be made of adobe, it just made space-saving sense to construct the closets with wood framing. A wall built of 2x4s and covered in drywall ends up being about 4.5 inches thick, as opposed to an 11 inch thick adobe wall. It also makes a lot of sense to have a wood framed plumbing wall in the bathroom, as it is much easier to house pipes in a frame wall than it is to notch out deep channels for pipes in an adobe wall.
With all that being said, guides to adobe construction often don’t address wood framing and drywall. An adobe builder usually must gather information on these topics from other sources. In previous posts I’ve discussed the wood framing and drywall installation process of my home. I thus felt that it might be helpful to describe my process for finishing drywall, so as to give the prospective builder an idea of what’s involved.
Before I get started, allow me to preface with a disclaimer: This is the first time I have ever finished drywall! Although I’ve experienced very positive results with my method, I am far from an expert at drywall. There are some really great experts with video tutorials on YouTube to which I would direct prospective builders for more detailed instruction (I found Home RenoVision DIY and Vancouver Carpenter to be the most helpful). The wonderful thing about building your own house is that you can figure things out as you go and develop your skills as you learn by experience. There are plenty of different techniques for finishing drywall – the following is a description of the way I approached this stage of construction.
Taping joints
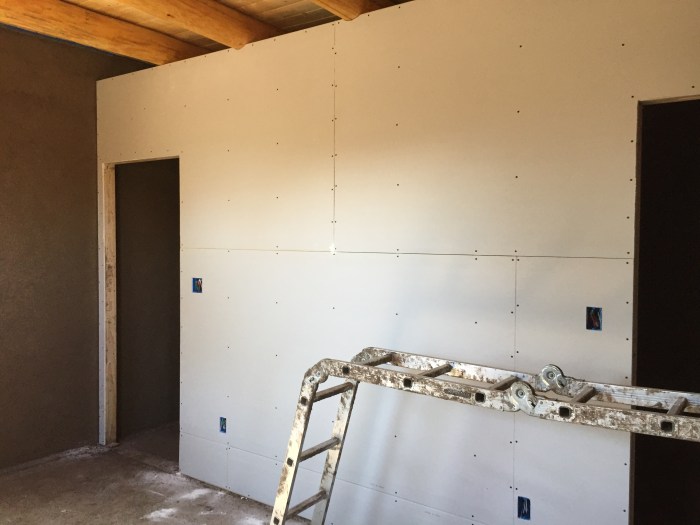
After completing the hanging of all the drywall to the frame wall, the next step is to tape over the joints where the drywall panels come together. There are two different types of joints. A typical drywall panel is 4×8 feet. The 8 ft. edges are tapered, meaning that the panel gets a little thinner along these edges. The 4 ft. edges are not tapered. Wherever two panels come together along their tapered edges, there is sufficient room for the tape and joint compound (also called “mud”) to be well-hidden in the depression created by the tapered edges. When two non-tapered edges come together, this is called a butt joint, and there is no depression to hide the tape and joint compound.
With either type of joint, the key is to tape and mud the joints while minimizing the amount that the tape and mud raise the level of the joint. It is important to note that the process of taping and mudding inevitably creates a raised area where the two panels come together, but the goal of mudding is to spread this raised area out so that it is gradual and unnoticeable.
Every joint requires drywall tape. I used paper tape exclusively, although some advocate for using mesh tape. My method for taping was as follows:
- Apply joint compound to a joint with a 4″ taping knife. Just get the mud on the wall first. Before applying tape, run the taping knife lightly across the mud on the wall to create a relatively uniform layer of mud that is free of air bubbles and has a consistent thickness. The key here is to keep the thickness of the mud relatively minimal. Too much mud creates more of a raised joint than is desired and is difficult to tape over. Too little mud will likely result in air bubbles forming under the tape and could result in poor adhesion of the tape to the wall. Use no more, nor less, mud than is necessary!
- Next, apply a strip of tape over the mudded joint. Make sure that the crease down the middle of the tape is lined up with the center of the joint between the two panels. Get the tape lined up on the joint lightly at first to make sure you have it exactly where you want it. Then, starting about 12″ from the end of the strip of tape, take your 4″ knife and smooth the tape down to the mud all the way out to the end of the tape. Smooth out the rest of the tape all the way to the other end. Pay close attention and make sure that there are no air bubbles under the tape. Make sure that the tape looks flat and uniform.
- Once the tape is in place and looks uniform, apply joint compound on top of the tape with a 4″ or 6″ knife. Don’t worry about the thickness of the mud, as most of it will be taken right back off. Once a section of tape has mud on it, run the taping knife back over the mud in such a way that takes off the majority of mud. The goal of this step is to just wet the top of the tape so it is less likely to peel off the wall. By applying the joint compound and taking most of it off again, the tape is moistened and is more likely to bond with the mud below. Some people keep a lot of mud on top of the tape, but I found that it was best to leave only a very thin layer. This helps minimize how raised the joint is.
Those are the basic taping steps that I followed. There are some additional steps for mudding inside and outside corners, but refer to a complete taping and mudding guide for those steps. Applying the drywall tape is, I think, the hardest and most tedious part of this process. It’s also essential to do a good job on the taping, as a bad tape job can really make the final product look bad.
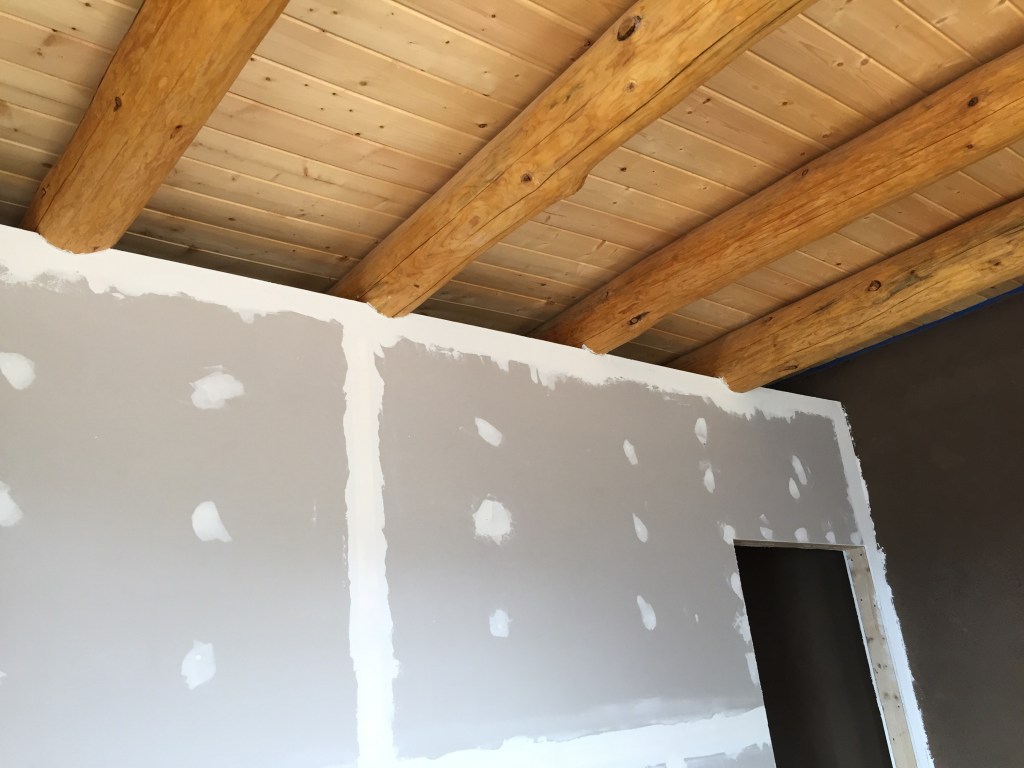
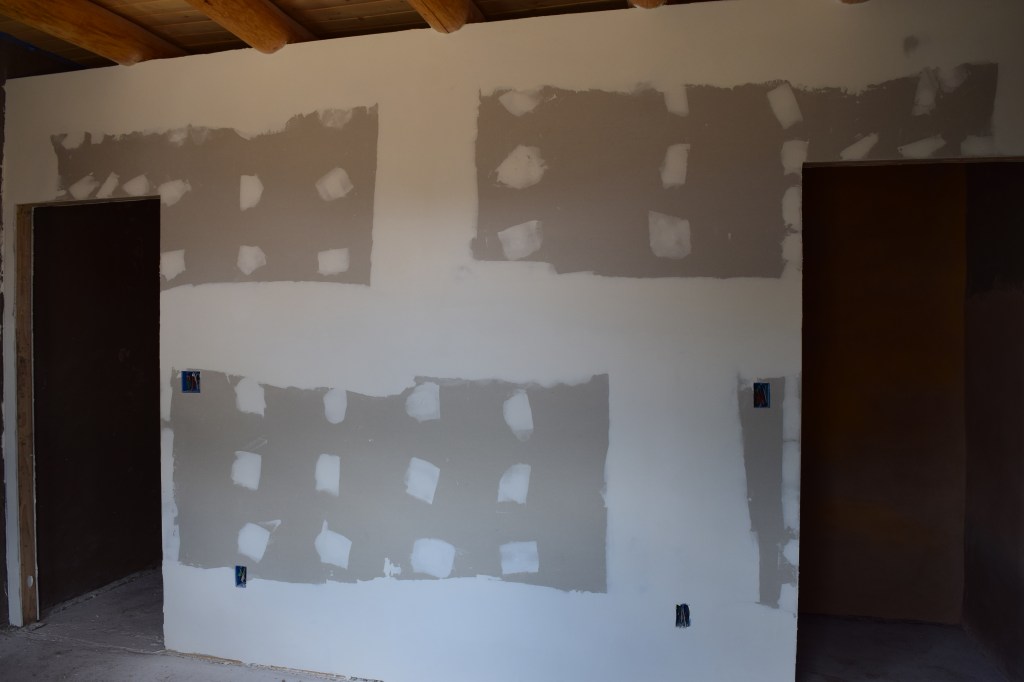
Also, during this first coat of mudding, make sure to add mud over each drywall screw. I would apply some mud over each screw and then take the mud off again with a pass or two. Mud would be left covering the screw and the mud surrounding the screw would be minimal.

Adobe wall consideration
Most drywall tutorials and guides assume that every wall will be finished with drywall. For an adobe builder, this is not the case. All of my drywall has an adjacent adobe wall that it comes into contact with. Make sure that the drywall is protected wherever it comes into contact with an adobe wall. This is easily accomplished by putting a metal J Bead (also known as J Cap) along the edge of the drywall. Some people leave the metal J Bead exposed, while others mud over it. I decided to mud over the J Bead. When mudding over the J Bead, it was somewhat difficult to keep dirt from the adobe walls (covered with just the base coat of plaster) out of the joint compound. Even tiny particles of dirt can make mudding difficult, so just keep this in mind.
2nd and 3rd coats of joint compound
Once all of the joints have been taped and mudded with the first coat, it’s time to add the second coat of joint compound. I chose to do three coats of joint compound in total, and then added a skim coat at the end. Some people do even more coats over the joints, but I’d recommend doing at least three.
For my first coat, I used a 4″ taping knife. On the second coat, I used a 10″ knife, but didn’t stretch the joint compound out the full 10 inches (only about 8 inches). On the third coat, I used a 14″ knife, but a 12″ knife would have probably worked just as well. The concept behind the different knife widths for each coat is that you want to continue to spread out the raised area of each joint. The more that this raised area is spread out, the less visible it will be when the wall is finished.
The second coat goes on much faster than the first, and the third coat even faster than the second. The main thing to keep in mind for these coats is to feather out the edges of mud. It’s also important not to add too much mud with each coat. The more mud you put on the wall, the more raised the joint becomes and the more sanding you have to do. Following my method for the first coat of taping and mudding, you don’t have to sand the first coat at all (unless, of course, there are some particularly rough spots).
Here’s my process for the second coat:
- Apply mud over the joint with a 6″ taping knife. Make sure that there is slightly more mud on either side of the joint than there is directly on top of the joint. Smooth the mud out to make it uniform before going over with the 10″ knife.
- Take the 10″ taping knife and smooth out the mud. I usually did around 3-4 passes with the taping knife. One pass feathers out one edge of the mud. One pass feathers out the other edge of mud. Another pass goes down the middle of the joint and smooths everything out. You may need another pass (or a few partial passes) to touch things up and ensure that the mud is smooth.
Keep in mind that a thin raised line of mud is easily sanded away once dry, however, even shallow lines cut into the mud are harder to take out with sanding. With the second coat, lines that are cut into the mud are not a huge deal as long as they aren’t too severe. Just make sure that the edges of mud are tapered, the mud is generally uniform and smooth, and that not too much mud has been added.
Apply another coat of mud over the drywall screws. Keep the amount of mud to a minimum and make sure it is smooth.
Before adding the third coat, use a hand sander to smooth out the second coat of mud. Focus on taking out any raised lines and taking down any edges that aren’t feathered. Aggressive sanding over the taped joint could end up taking off the tape if you’re not careful, so make sure you’re not taking off more mud than necessary. Don’t tire yourself out by sanding where it isn’t needed – just sand the places that might make applying the third coat more difficult.
Here’s my process for the third coat:
- Apply mud along the joint with the 10″ knife. Again, focus more of the mud away from the center of the joint and on the previously feathered edges. For joints with tapered edges, I just put down a strip of mud about 12 inches wide. For butt joints, I put down a strip of mud about 20 inches wide. My rationale for this difference is that the butt joints are more raised than the tapered joints, and thus, require more mud to hide the raised ridge. Before the next step, smooth out the layer of mud to make it uniform.
- Use a 12″ or 14″ knife to smooth out the mud. For joints with tapered edges, I did 3-4 passes with the knife in a similar manner as I did for the second coat. For butt joints, I usually had to do more passes with the knife, but the concept of the passes would be the same. The area would be wider than 14 inches (usually in the range of 18-24 inches), so I’d have to feather each edge and then do a couple passes down the center. Sometimes a raised line or two of mud would be left at the edge of the knife after all the passes had been completed. This is to be expected and is not a concern if the lines are thin, as they are easy to sand away later.
Once the third coat of mud has been completed, the walls should look pretty good. If you sight down the wall at different angles, you shouldn’t be able to notice that the joints are raised. The third coat of mud should be uniform and smooth.
Skim coat
Following the third coat of mud, I chose to do a pseudo-skim coat following the sanding down of the third coat of mud once dried. I used an orbital sander to sand down the third coat, and I tried to get the mud really smooth and uniform prior to applying the skim coat. At this point, it is particularly important to make sure the edges of mud are feathered out to be very thin. When using an orbital sander, just be careful not to take off more mud than necessary.
For my pseudo-skim coat, I used my 14″ taping knife to fill in the areas between the joints that I had previously mudded over. These un-mudded areas shouldn’t be that large now that the joints have been stretched to somewhere between 14 and 24 inches. I kept this skim coat pretty thin and I tried not to overlap the areas that I had already mudded. I kept the skim coat as smooth as I could. Keep in mind that anything that isn’t smooth is going to need to be sanded down later.
Once the skim coat on a wall had dried, I got out the orbital sander again and sanded over the entire wall. I switched to a finer grit of sandpaper and tried not to dwell on any place for too long. The key is to just take out any lines of mud and smooth over the wall. I would step back periodically and look at the wall from different angles to see if there were any noticeable ridges or glaring imperfections.
And that’s my summary of how I finished my drywall! I’ll eventually prime and paint these walls, but that’ll be a ways down the road. There are plenty of great ways to do your drywall and I don’t recommend my way over any other. Like I said earlier, I’m a bit of a novice at this. I just wanted to provide a basic step-by-step introduction to this topic to give adobe builders a better understanding of what is involved. Please reference a more complete tutorial on drywalling, as can be found on the YouTube channels I provided links to earlier in this post. These guys are professionals and are much more experienced than I.
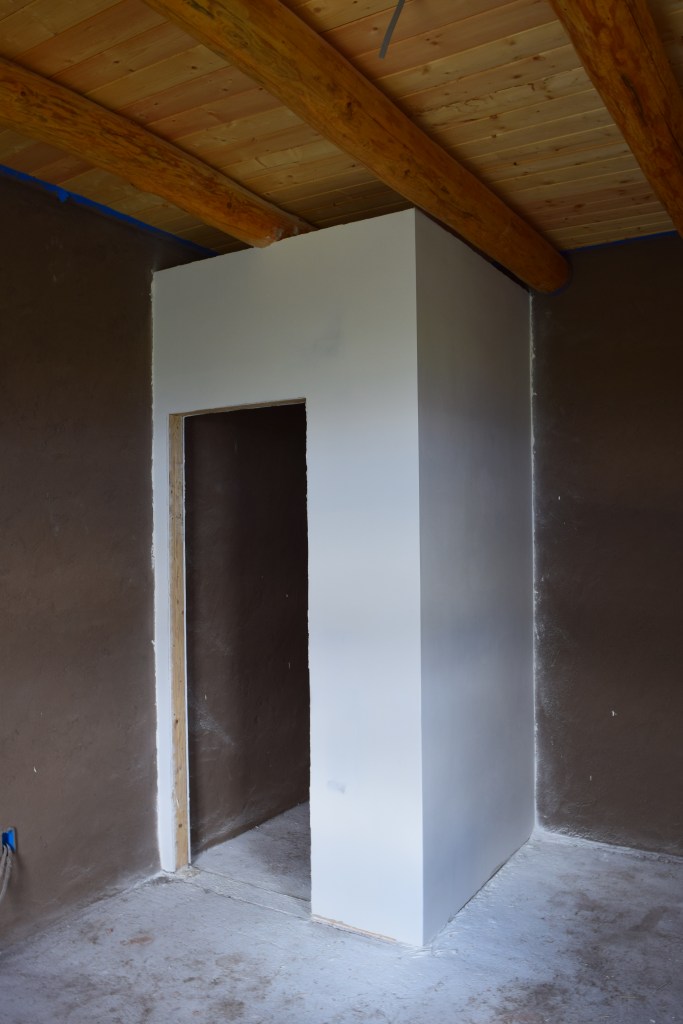
Compared to building an earthen wall, wood framing and drywall isn’t nearly as enjoyable. It does look nice in its own way though, and can provide a nice visual contrast to the earthen walls in your home. I wanted to make my drywall look as nice as possible, since these walls will stick out against the mud-plastered adobe walls. The methods I describe above seem like they will result in a really nice finished wall.
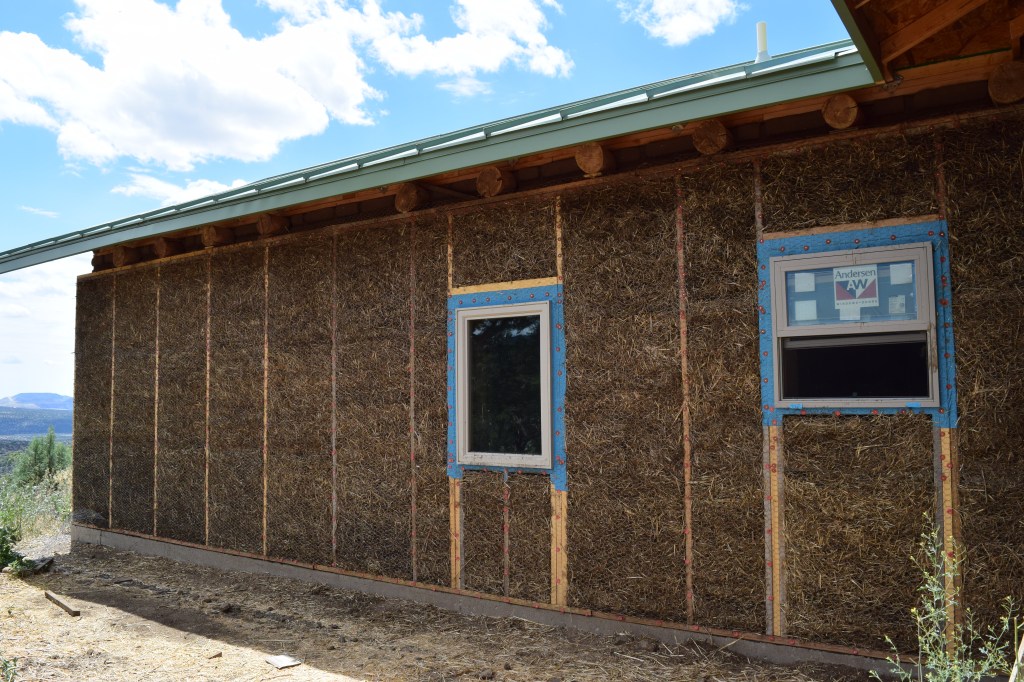
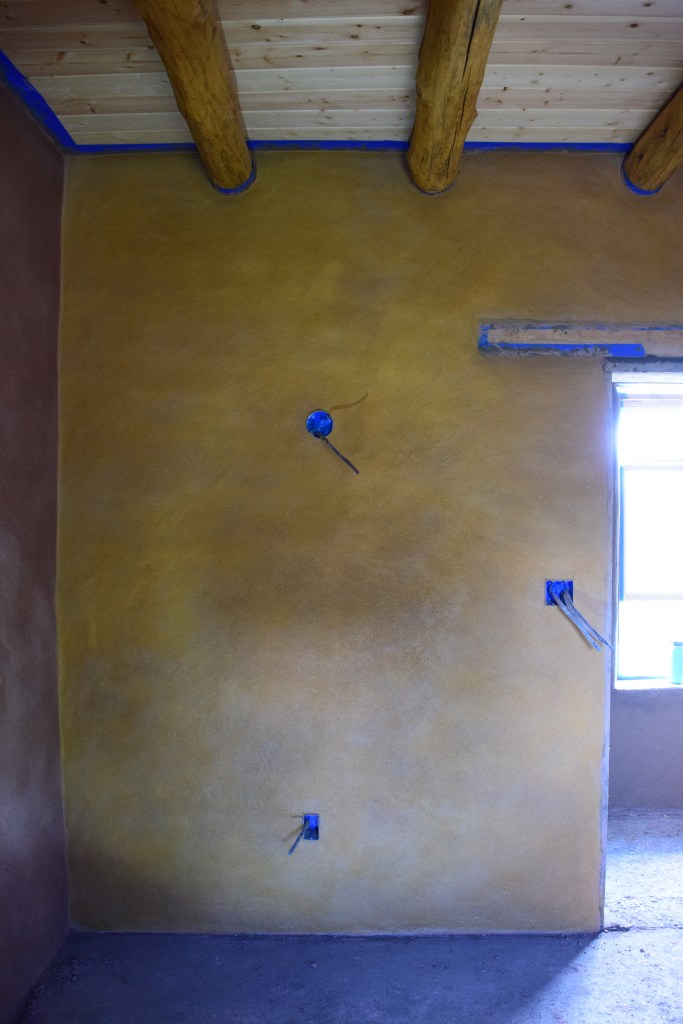
Finally, I just wanted to include a couple of random photos at the end of this post that highlight some of the other recent work we’ve been doing. Stay tuned for future posts that address these projects in greater detail.

Good evening visioncreationadobe, thank you for all the step reminders. It has been many years since I have done drywall (learned on the house I am currently living in, sure cringe at the places where I did a poor job of taping:-) ) just one thing I didn’t see mentioned was letting each new coat of drywall mud dry thoroughly before adding the next coat. Thank you very much for sharing your travels on this adventure. I am currently taking the AinA courses and will finish in just a few more months. It may be a couple of years before I get to start on my house but I soooo look forward to it. Even if I don’t get to start soon I may start making my adobe’s just so I can be doing something towards my new home. Take care
Valerie
LikeLike
Hi Valerie, Thanks so much for your comment. You’re absolutely right about letting each coat of drywall mud dry completely before adding the subsequent coat. This helps reduce the chance that the mud will crack, and I’m pretty sure sanding damp drywall mud is quite difficult!
I’m excited for you to build your house! Even if you don’t start it soon, the extra time you have to envision it and plan it out will likely be worthwhile. Excellent idea to start making your adobes in the meantime – it is a tiring, but highly rewarding process! If I am ever able to be of some help, please let me know. Best of luck with the AinA courses!
LikeLike
The straw insulation is fantastic Idead.
Good tips on the tapping of the drywall many people struggle with that and you gave out great instructions. The plastered wall looks amazing I love that color. It looks like its coming together well well BRAVO!. I myself put up drywall and you did well!
Best regards from Camarillo California
https://www.101homehelp.com/
LikeLike
Thanks so much!
LikeLike
You did well on the drywall, plus you gave out good step by step instructions. This is coming from someone that hangs up drywall, The color of the plaster also looks great on topo of straw insulation!
Best regard from Camarillo California
https://www.101homehelp.com/
LikeLike
Thanks so much for your comment! Installing drywall isn’t as enjoyable as working with earthen materials, but it worked well for our closets and bathroom plumbing wall.
LikeLike