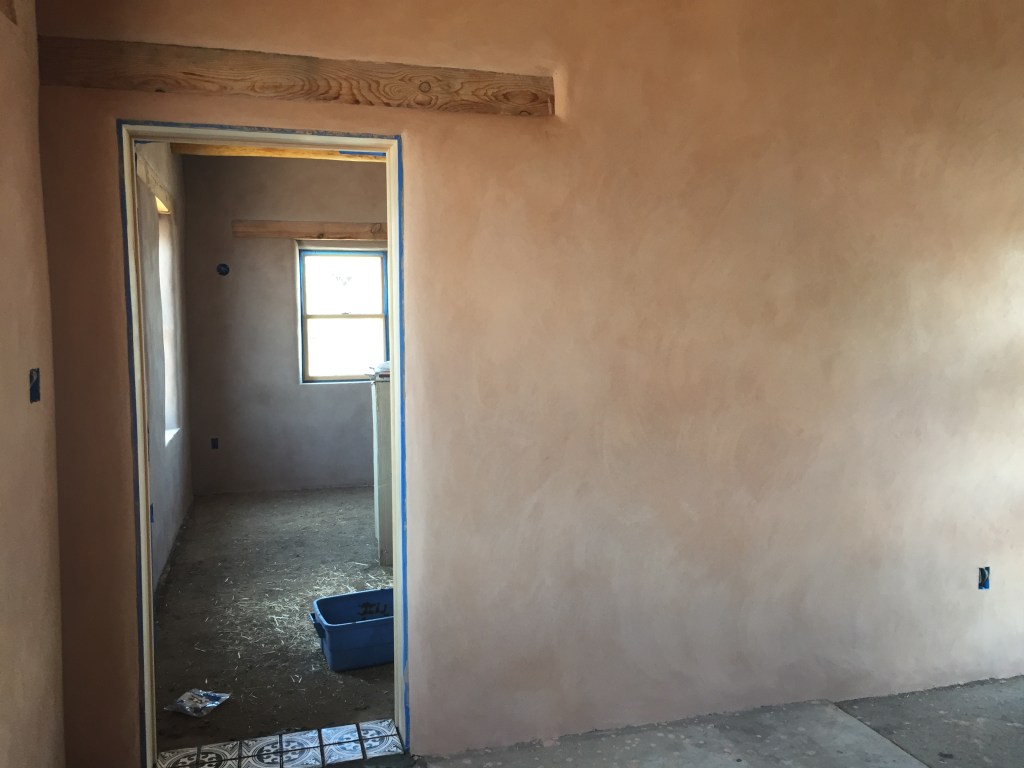
This second part of our final plaster coat process comes after we’ve plastered quite a few more walls since the original post. I wanted to include some new photographs of our work and share some additional lessons learned.

We’ve pretty much kept our process the same, and we continue to experience good results with our method (see the our first post on this subject). I’ve started to go back after the plaster is fully dry and do one last sponging over the entire wall. I do this entirely for cosmetic purposes. I have found that this final sponging removes sponge streaks left from the original sponging when the wall was wet. It also helps blend in any repaired cracks. While we don’t experience too much cracking, there have been some hairline cracks that appear when the wall is fully dry. I simply rehydrate some of the extra dried-out plaster that I saved and rub it into the cracks with my fingers. The final round of sponging helps blend in these patches.
I can’t stress enough how important it is to begin hard-troweling at the right point in the drying process. If you wait too long, the plaster can still be troweled to a nice finish, but it takes considerably more effort. I try to begin hard-troweling before I start to see any spots on the wall getting dried out, which is noticeable due to the lighter color. Sponging the wall is also more effective at closing the pores in the plaster when the plaster is not too dried out. Again, it still works when the plaster is more dried out, but it takes more effort and is less effective.
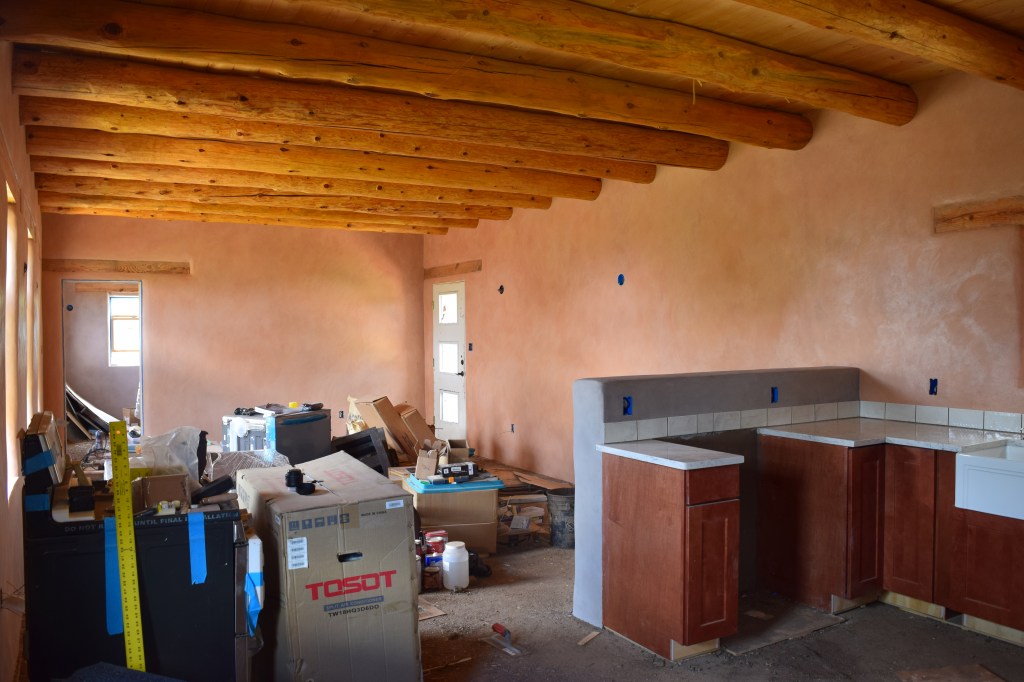
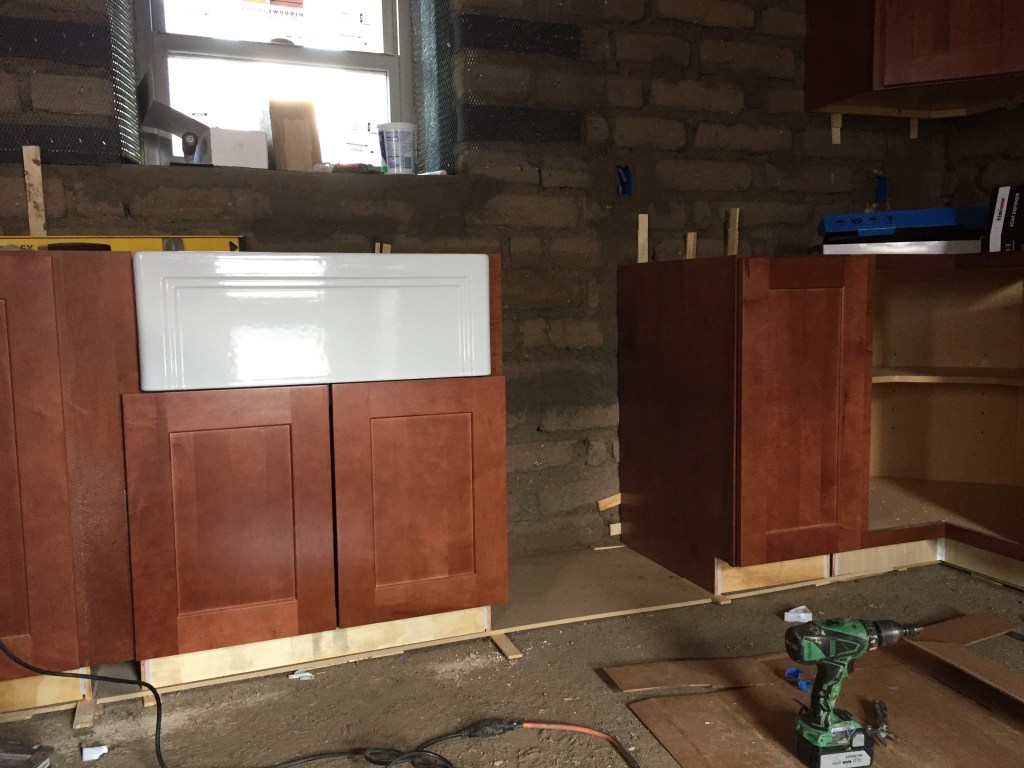
In the kitchen, we chose to wait to begin plastering until after we had finished the cabinet and countertop installation. This was mainly to allow sufficient room for the cabinets to fit perfectly in the designated space, but it also had the benefit of reducing the amount of wall space that required plaster coverage. The cabinets created some difficult spots to reach with a trowel (mainly above the wall cabinets), but the finished look makes the cabinets and backsplash tiles appear perfectly incorporated with the wall plaster.
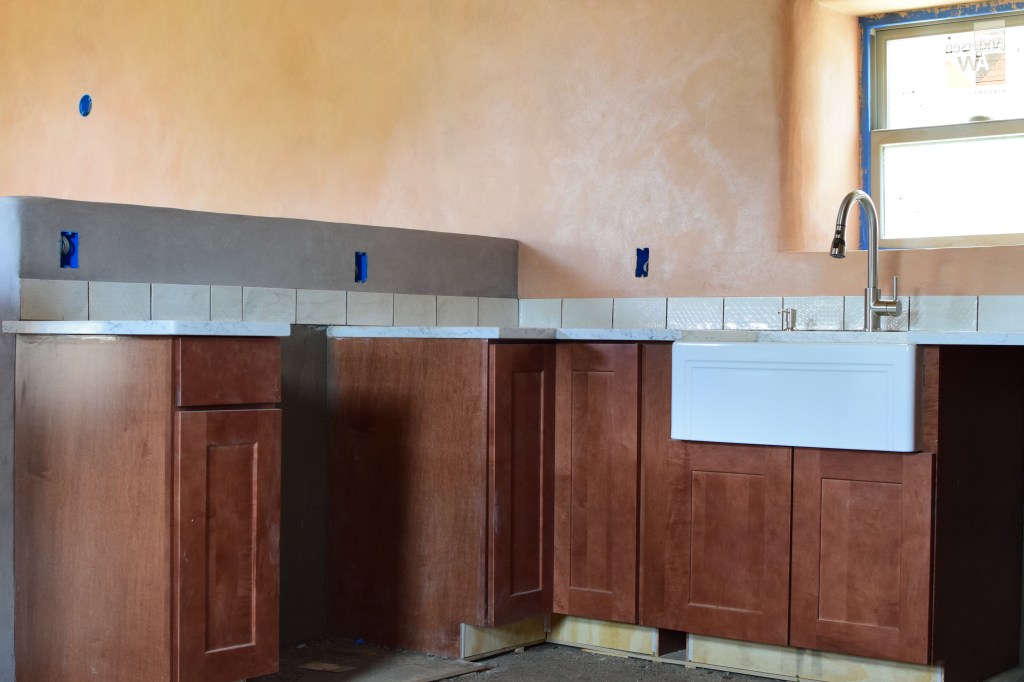
Once the cabinets and countertop were in place, we put up the basecoat of plaster. Prior to the second plaster coat, I installed the backsplash tiles. I used thinset mortar right on top of the basecoat plaster, and it adhered perfectly. With the backsplash tiles in place, we then put up the second and final coats of plaster. This allowed the plaster to come all the way out to the surface level of the tiles, which is really a nice look.

Kitchen cabinets and countertop
Perhaps this is an appropriate spot to back up and mention a few points on setting up the kitchen in an adobe house. We ordered our cabinets and quartz countertop through Lowe’s. Erika and I installed the cabinets, but the countertop had to be installed by a separate company (required by Lowe’s).
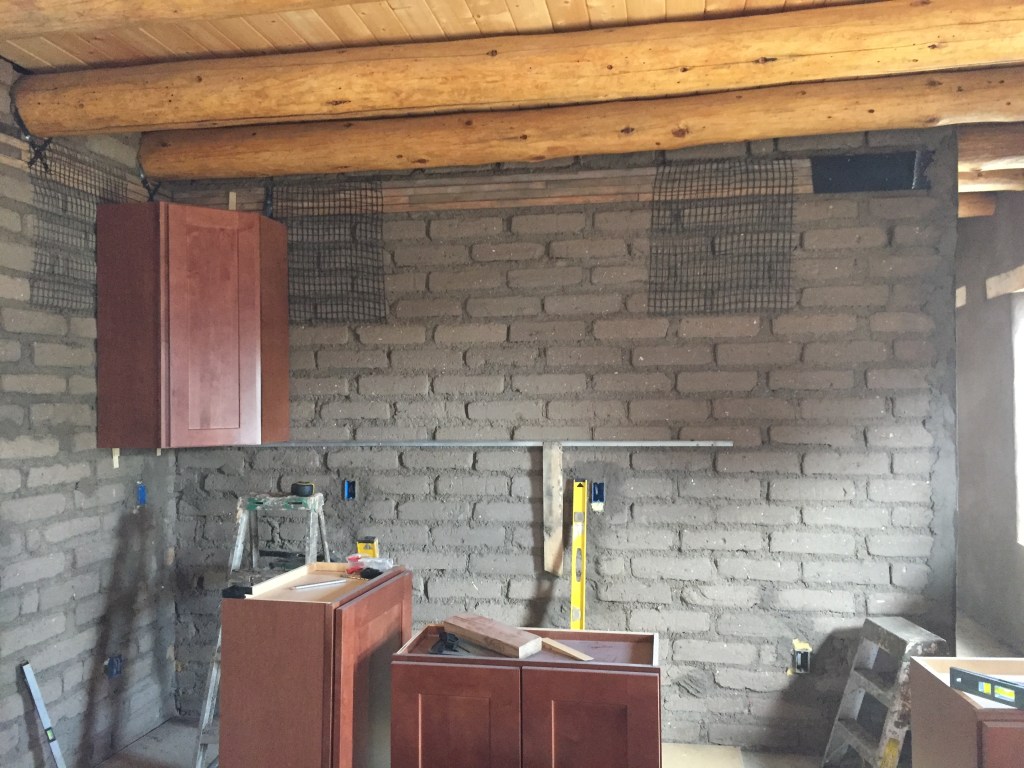

We didn’t have much trouble installing the cabinets. We hung the wall cabinets first. 6-inch screws held very solidly in the adobes. You just have to make sure you put the screw as close to the center of each brick, and not in the mortar joint. The floor cabinets required a good bit of leveling, but otherwise, went in problem-free. We had just the right amount of space. Everything fit perfectly. The most challenging part was making the cut out in the sink base cabinet for the farmhouse sink. Not much room for error!


earthen floor – 2nd Layer
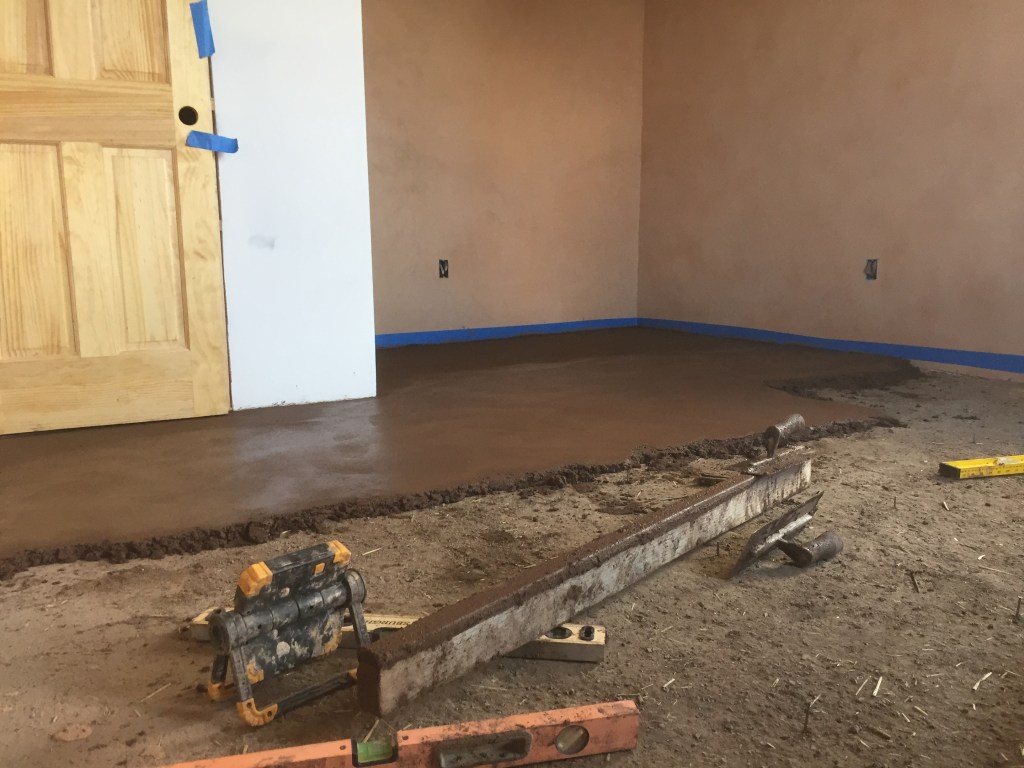
About a year-and-a-half ago we installed the initial base layer of our poured earthen floor (see the initial post on this process here). This layer is around 4 inches thick. Having almost completed all of the plastering for the interior walls in the house, we’re now getting ready to do the second and (hopefully) final coat of floor. We’ll have to see how nice we can get this second floor layer to see if we can get away with it being the final layer.
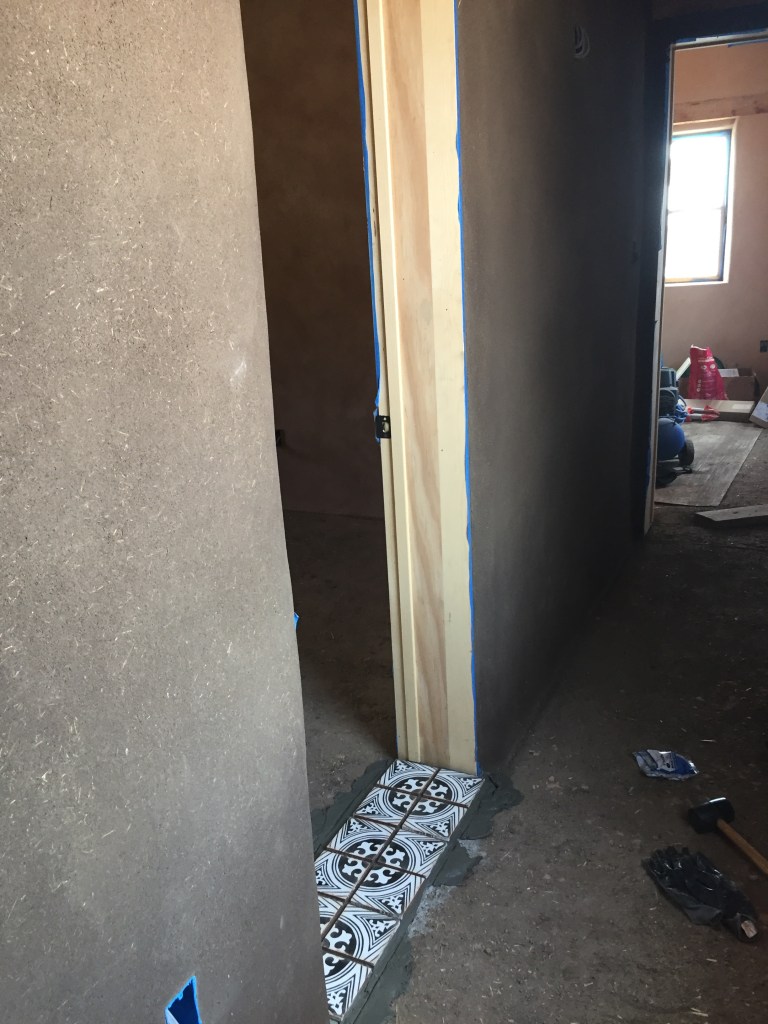
Prior to pouring the floors, I needed to tile all of the thresholds between rooms and at the closets. We purchased some elegant 5×5 inch black-and-white patterned tiles from Spain. The thresholds were left a bit rough from our initial foundation concrete pour, so I had to go back over them with some new concrete to smooth them out and raise them up to the desired level.

Then, I used thinset mortar to set all of the tiles on the thresholds. I’m really happy with how they came out, although it proved to be a bit difficult to match the elevation of the various thresholds. Ultimately, they’re all pretty close.
I did my first trials of the second floor coat in the various closets throughout the house. Although the surface areas of the individual closets are relatively small compared to the full rooms, they are big enough to get a sense of how the floor in a full room will look and how smooth it will be.
I used a relatively dry mix for this floor layer. This helped speed up the drying time (which is still pretty long) and supposedly reduces cracking and slumping. I created the following recipe:
- 2 shovelfuls of white clay (screened to 1/8 inch)
- 7 shovelfuls of brown clay (screened to 1/8 inch)
- 22 shovelfuls of mason sand
- 2 shovelfuls of old horse manure (for straw content) (screened to 1/4 inch)
- 2 quarts of wheat paste
- 5 tablespoons of red iron oxide pigment

The base layer of floor has gotten pretty roughed up since we’ve been working on top of it for over a year-and-a-half. Unfortunately, our once level base layer has now been worn down lower in areas that have received heavier travel. This makes the leveling process for the second layer a bit harder.
Given the situation, the leveling method that I think will work best is using nails to establish the finished floor height. I use a builder’s level to match the desired finished floor height with the top of a 3 1/4 inch nail that I hammered into the floor. I then used a 2-foot level to match this height with other nails throughout the area to be poured. Although this is a time-consuming process, it seems like it is more accurate than using screed rails on a less-than-level base layer of floor.
We dump buckets of the floor mix onto the floor and then use a 2×4 to screed the floor approximately level with the nails. We then use trowels to further smooth the mix out and ensure that the floor is right at the level of the tops of the nails. Before we add more mix, we pull the nails out from the finished section, sometimes leaving one or two in temporarily to help level the subsequent section. We often then use 2- and 4-ft levels to check the floor, filling in any low spots and taking down and high spots.

Depending on the thickness of the floor, I can go back over the floor to burnish it about 1-2 days following the pour. I use a few squares of 2-inch rigid foam insulation to work my way out on top of the floor. At this point, my weight on these insulation squares creates very little (if any) depression in the floor. Any depression created by the insulation squares can fairly easily be troweled out during this burnishing process.
Burnishing the floors is a hard job. It’s very similar to the process of hard-troweling the wall plaster. I use a sprayer to re-wet a section of floor, and then I use a small pool trowel to hard-trowel the floor surface. I use a lot of force to really push the floor down, to remove any trowel marks, and to compress the edges of the floor where it meets the walls. The result of all this burnishing is a more uniform surface.
We’ve now poured the floors in two of the bedrooms, and they’ve shown good results so far. I will need to continue to improve my ability to keep the floor level. The floor surface is uniform and smooth. Although this floor mix with 1/8 inch sand/clay sizes is a bit more porous than a mix with smaller grain size would have, I was actually able to achieve a fairly tight floor surface. I’ve also heard that a slightly more porous floor has the benefit of soaking up more linseed oil (a later step), thus increasing the hardness of the floor surface.
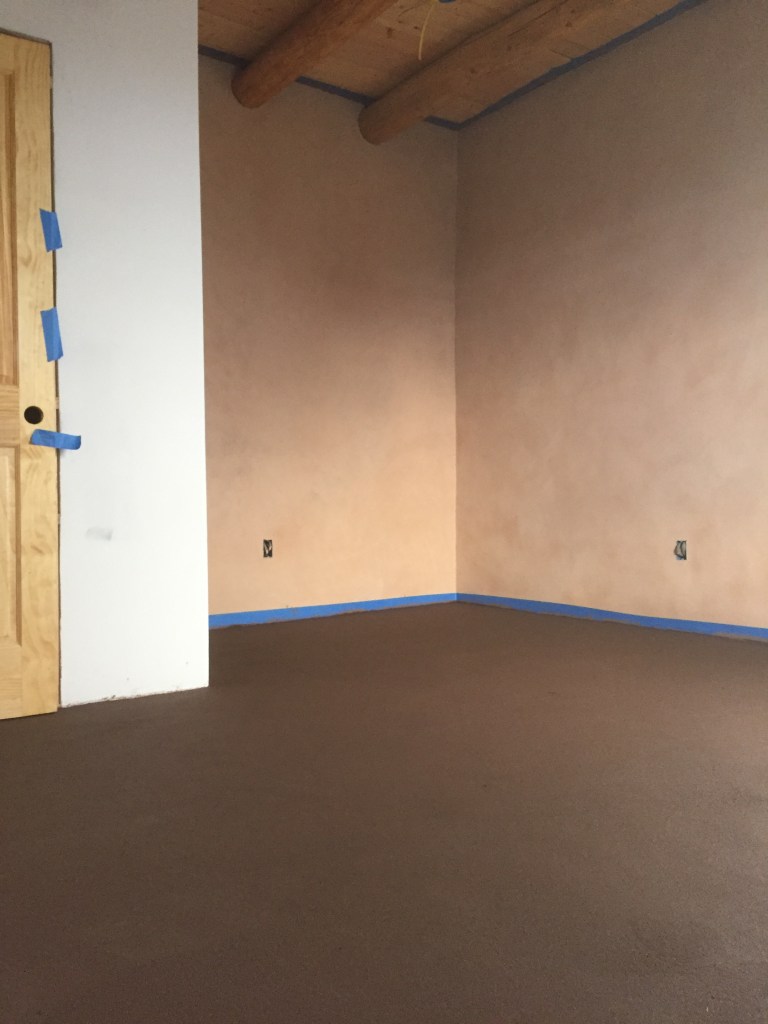
All the floors we poured recently are still drying. We’ve been having very wet weather recently, so when I’m not at the house I have to keep the windows closed. Some of the floors are dry enough to walk on with your shoes off. The floor surface is very pleasing to walk on. It’s hard to articulate exactly why it feels good. Perhaps it’s because it’s still a bit soft, not being fully dry all the way through and not being sealed with linseed oil and wax. Whatever the reason, the floors feel great to walk on! With the walls fully plastered, adding a smooth floor really helps complete the rooms.
Over the next month or so, we’ll continue to pour the floors throughout the house. Once they are fully dried out we’ll begin to apply the linseed oil. More on that in the future, so check back soon for updates!

Hi Ethan,
The walls and floors look fantastic! Only a crew boss with infinite patience can achieve such beautiful results. Congrats!
LikeLiked by 1 person
Hey thanks Lolly! Thanks for the feedback and for keepin tabs on this project! Kinda in the home stretch right now, which is exciting!
LikeLike
Hi Ethan,
I continue to be amazed and so impressed with your meticulous work ethic. All your detailed explanations are so instructive for others. The pictures of the walls, floors and thresholds are beautiful! Can’t wait to see it in a few months!
LikeLike
Some fine looking work there for sure ! I’ll have to reread your flooring recipe when I get to this stage someday in the future !! Good job guys !👍
LikeLike
Your hard work and precise execution really show. The earth colors are wonderful. You’re closing in! Best wishes to all three of you. – Anne
LikeLike
Thank you Anne! Those compliments mean a lot coming from an expert adobe builder like you! We are definitely closing in and we can’t wait to be living there!
LikeLike
As an unknown watcher-of-your-project, it’s been nearly 4 months, and I’m getting concerned 🙂 Any news on how things are going?
LikeLike
Hi there! Thanks for checking in on our status! We’re still going strong, just haven’t had a chance to post new content in a little while. To provide a quick update, we’ve finished the earthen floors, including the linseed oil and wax layers. We’ve also finished painting the few walls in the house that are drywall. We’re getting very close to being able to move in! I’ll try to create some new content on the website soon, so please stay tuned! Thanks again for following our project! We really appreciate it!
LikeLiked by 1 person
Hello,
I wanted to thank you for taking the time to write this blog, I have read every post and listened to your Mud Talks interview. Your blog is an amazing resource for anyone looking to undertake a similar project, your work is beautiful and I cannot wait to see it completed.
Thank you!
LikeLike
I’m so very thankful for your posts. We are just beginning to build our straw bail home and will be installing earthen floors. with one Google search I found your site and you answered a whole litany of questions. Thank you for sharing.
I’ certain by now you are enjoying the fruits of your meticulous labor.
Mark
LikeLike
Hi Mark, thanks so much for the kind words! Earthen floors take a lot of work, but the look and feel makes it a worthwhile effort.
LikeLike