A few months have passed and we’ve been busy working. We’ve finished our wood bond beam, completed the geogrid strapping, and peeled all the vigas. After working almost exclusively with wood materials over the past couple months, I can honestly say that I much prefer the bygone days of working with earthen materials. At this time of year in southwestern New Mexico we experience hot, dry days followed by frequent thunderstorms in the early evenings. Wood doesn’t do well when it switches from wet to dry so quickly. Wood also doesn’t do well when it stays wet for multiple days in a row. We’ve had our challenges with the weather, but overall things are looking good.

We finished up the bond beam in mid-June, prior to the start of monsoon season. We had a hard time initially getting the first layer of wood boards to bond well with the mortar. We’d spend a whole day finishing a section of boards – it would look great at day’s end, all neat and perfectly level. The next week when we returned to the jobsite, after the mud had dried more completely, we’d find that the boards popped away from the mortar. Most likely this was a result of the mortar sucking moisture out of the wood as it dried. This drying of the wood caused it to crown and break the bond with the mud as it curled upwards.
I believe it took us three failures. We’d try a new method each time. What finally seemed to work best was to do the first and second layers of boards at the same time. We’d get a board set in the mud, using a dead-blow hammer and rubber mallets to tamp it down and level, and then immediately go over it with the second layer of wood screwed on top. We’d then add adobe bricks on top to keep everything weighed down and (hopefully) kept in place. These methods seemed to work fairly well. Overall, these first two layers of the bond beam were quite a nuisance to construct. The third and fourth layers were much easier and quicker to finish.
After we finished the bond beam, we moved right along to peeling the vigas. Make no mistake about it: peeling vigas is hard work. We started peeling during the hottest part of the summer, late June, just before the monsoon rains arrive to cool things down. Days of dripping sweat and blistered hands. Daniel and I would get a log up on the saw horses and work on peeling it together. We’d talk, cuss, listen to music, and try to make it through a full day of pulling against stubborn bark. A deep bed of bark rose below our feet and our bodies got used to the drawknife motion.
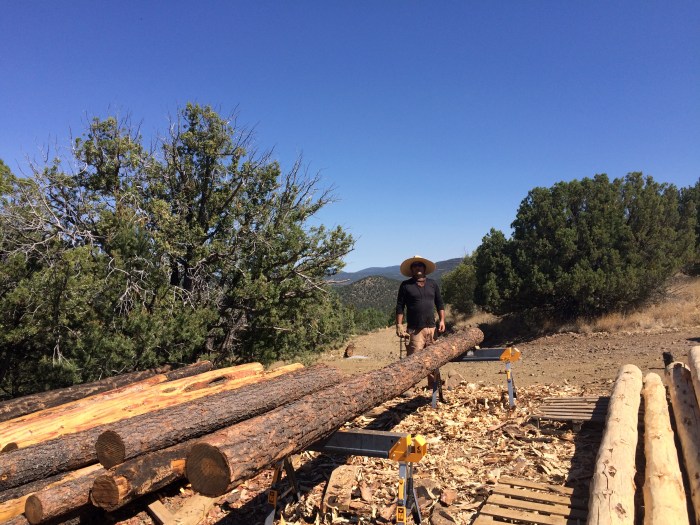
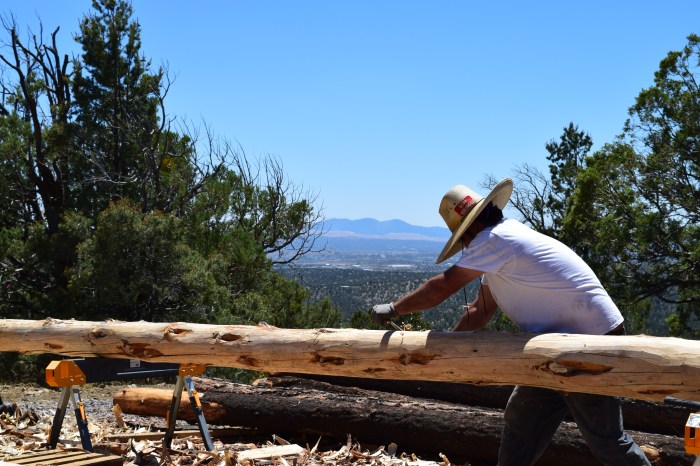

Once the last viga was peeled, it was time to do the finishing work. We’d get a peeled viga up on the sawhorses and drawknife off any areas we missed previously. We’d then run palm sanders over the viga just to lightly clean up and partially smooth out the wood. Let me emphasize that this was very minimal sanding – once the vigas are up in the house, I want them to tell their story, drawknife marks and all. I want them to keep their rough appearance and show minimal processing.
Following the sanding, Daniel would spray them down with a mold-killing solution. I’m not thrilled about doing this, but it had to be done. We wanted to make sure that mold wouldn’t be a problem going forward. After this spray down, we’d strap the viga to my metal wheelbarrow and move it to one of our three finish piles of vigas located around the house. Once the viga was in location and dry, I’d spray the viga down with a water sealer to keep it safe from precipitation before we get the roof on the house.

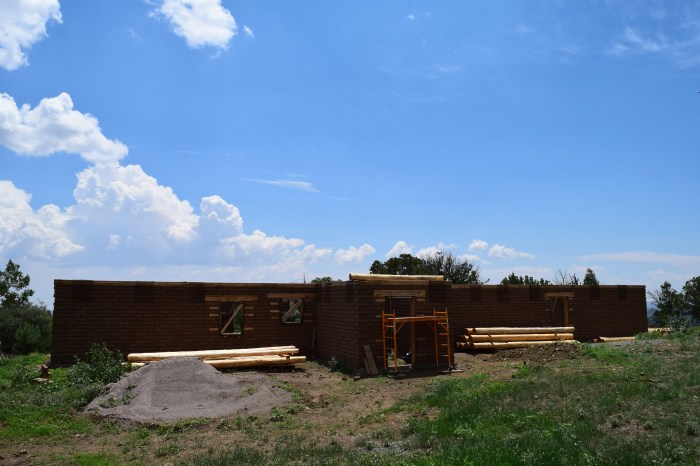
As of Sunday, August 5th, all the vigas are in place and ready to go up. We’ve arranged to have Stu of Custom Steelworks come out with his small crane truck on Friday, August 10th to help us put up the vigas. I must admit I’m a little embarrassed to not be getting the vigas up purely with good ol’ fashioned manpower, however, let me state my case: Megan and I are expecting a little baby boy the following week and it’d sure be nice to have these vigas up on the house before then. Daniel and I plan to put up the smaller vigas above the utility room by ourselves, but at this point it just seems quicker and safer to get the larger vigas up with the help of a crane.


Thanks for the amazing updates on your incredible house…and now, on to your new project that will dwarf this one by a mile! Can’t wait to hear your exciting news.
LikeLike
Thanks for reading along and being interested in what we’re doing out here! These are certainly exciting times!
LikeLike
I have been watching your progress since the beginning (never commented), but I like how well you have progressed and your fairly detailed instructions and ideas, it gives me lots of ideas for my project ! Can’t wait to see the future results, and of course, the finished product !
LikeLike
Hi Benjamin, Thanks so much for following our project! I’m very pleased to hear that these posts have been helpful for you as you contemplate your project. Would love to see images of your build when you embark on that journey! We’ll keep posting about our project here, and we’d be honored if you continue to follow along with us!
LikeLike
having built this way many years ago, advise you look into some serious termite treatment. it is a bummer when they eat the ends out and the roof is subject to falling in.
LikeLike
Just because you are recouping old technology in constructing your new home does not mean you should forego any modern technology for health protection like mold abatement, termite control, or etc.
LikeLike
I don’t disagree with your statement, Ted. There are, however, multiple things to consider when deciding whether to use or forgo modern technologies in a building. For example, it’s important to consider the carbon footprint and environmental toxicity of any chemicals used. It is equally important to consider the potential impact (if any) to the health of future inhabitants. These considerations are obviously weighed against the utility of the technology and the degree of the threat to the materials that you are trying to protect.
Our choice to build with adobe is not meant as statement against modern building techniques. In fact, we see adobe construction as very much a modern construction method. We feel that adobe buildings can and should incorporate more recent innovative building techniques. I’d like to point out that our design does include numerous modern materials and building techniques.
Just as you recognize the importance of newer technologies in the success of a modern home, it is also important to realize the brilliance of older technologies that have proven themselves over time. One example from our project is the rubble trench foundation (also sometimes called a french drain or gravel trench foundation). The french drain has been around for at least 150 years and an argument can be made that it is a superior foundation method when compared to more modern foundation methods. I think a similar argument can be made for the adobe brick itself. An adobe wall can outperform a wall built of more modern materials and can do so at less cost and reduced environmental impact.
Your comment brings up a valid point and lots to consider. Thanks for reading and taking an interest in our project!
LikeLike
I appreciate how you described your process of working with wood in detail.
LikeLike