Happy 2019 to all of our intrepid readers! Thanks for following along with us in 2018 – we should have lots more interesting posts on our progress as we continue our build in the new year.

We finally finished filling in with our two courses of adobes between the vigas on December 13th, 2018. Our work was slowed due to several stretches of winter weather in November and December. We had to contend with high winds, rain, and freezing nights. The adobes handled the weather fairly well, but there were several times when we couldn’t lay bricks for fear of the mortar freezing before it dried completely.
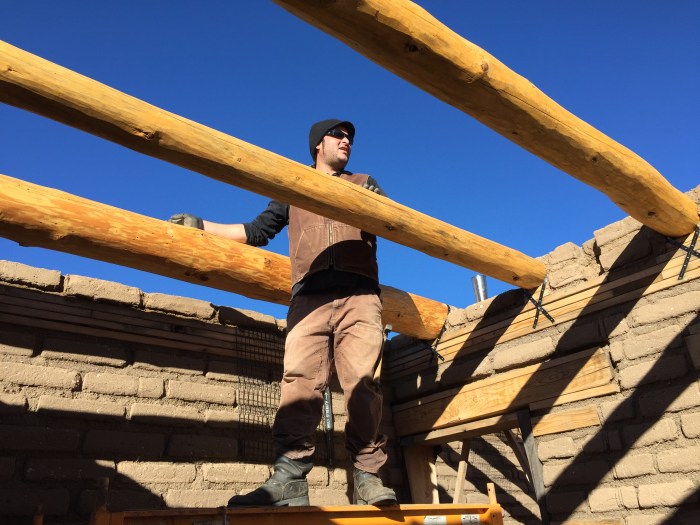
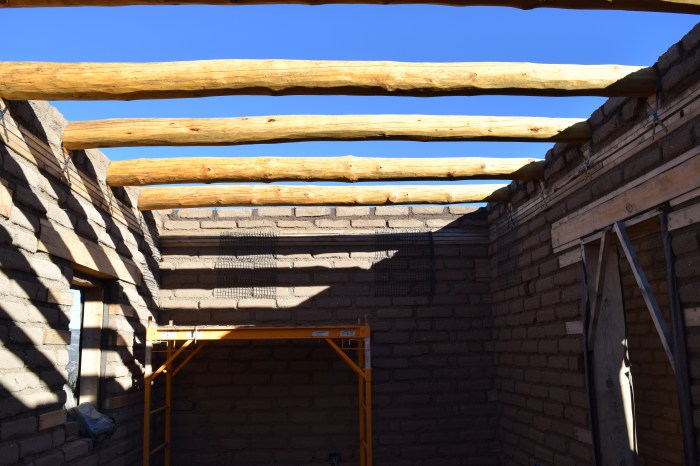
Filling in the adobes between the vigas was an enjoyable return to working with earthen materials. It was slow work, given the frequent need to cut bricks and the need to make occasional notches for electrical wiring, but as the walls closed in around the vigas, it made the vigas look more a part of the walls, rather than having them seemingly resting on top. Finishing the adobes gave a nice visual sense of completion to the walls.

—–
Fortunately, we finished our adobe work prior to last week’s blizzard and today’s snowstorm. As I write this paragraph, snow falls gracefully outside my window, blanketing the world thickly in white. Snow still worries me more than any other substance the clouds can dump from above – all that white stuff slowly melting into the bricks and mortar only to re-freeze during the frosty nights. It’s enough to make any adobero weary of a beautiful snowy day.
Daniel and I decided to give the homestead a look over with our own eyes this morning. I was anxious to see how much of last week’s snow had melted and what condition the walls were in. We started our drive up into the foothills as the snow was still lightly falling. The main roads were clear, but the dirt roads that lead to our place were snow covered. The driving wasn’t all that treacherous, but we decided to hike up the last mile or so to the house to avoid driving up the steeper hills.

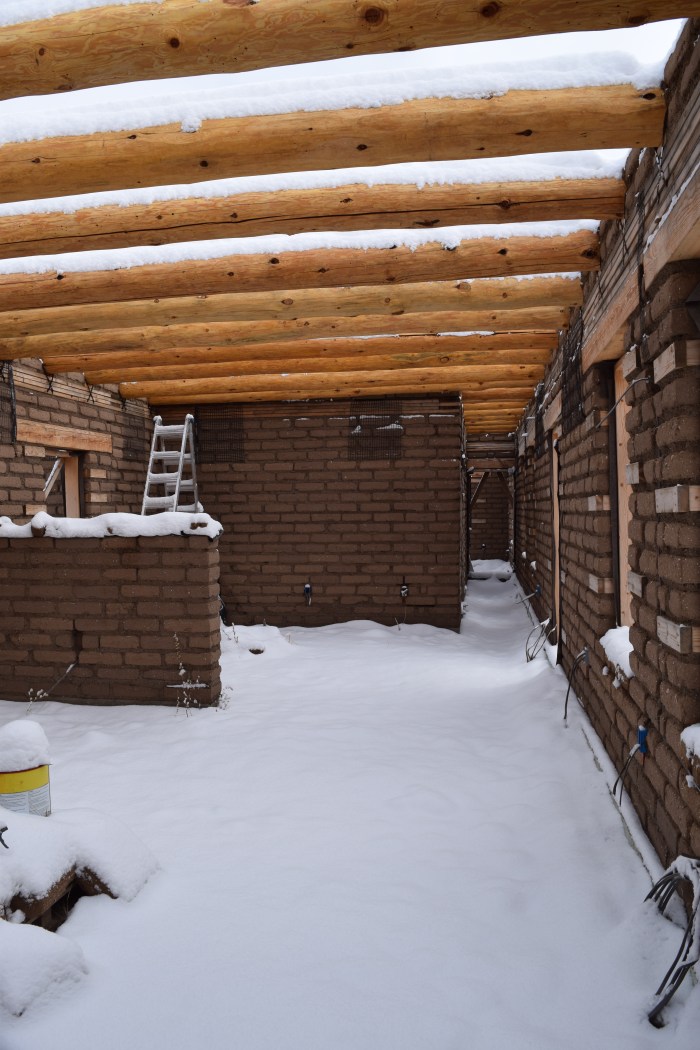
When we arrived to the build site we saw the house standing firmly in a snow covered landscape. There were a few inches of snow atop the adobes and more lining the tops of the vigas. The walls were dry below, as it appeared that not much snow had melted yet. The scene up there around the house was quite beautiful in its undisturbed state.
Our plan, however, was to remove the snow from the tops of the walls and vigas prior to the arrival of warmer temperatures tomorrow. I figured this would help minimize any damage to the walls from the moisture and subsequent re-freezing. We got most of the snow off as more snow began to fall. It didn’t seem like much would accumulate, as it was just a light snow. We hiked back down the mountain to the car as the snow fell.
—–
The next task to complete will be to install a top plate of wood all around the walls of the house. The roof structure will attach to this top plate. We plan to use two course of 2×6 wood for constructing the top plate. My wood delivery will likely be pushed back until next week when the truck might have a chance of getting up to our place. I’ll save further discussion of the top plate for my next post!

Hey, I’m really excited for you. This is a beautiful project you are doing. Earthen, Passive Solar! You rock! It’s a real shame more people don’t build with the earth with design elements not blocking the sun’s warming that is available most days in our region. I did it 35 yrs ago in the Mimbres. Bermed into a south facing hill with integrated greenhouse.
LikeLike
Hi Mike! Thanks for reading and thanks for the compliment on our work! Your house in the Mimbres sounds awesome – would love to see photos or see it in person. Thanks for checking out our site!
LikeLike
I work at the Food Co-op on Wednesdays if you want to meet and plan time to get together. I no Longer have that house but live in a stick frame passive solar in Silver City that we bought.
LikeLike
Do you need help? I live in Tucson Arizona and I have an Adobe structure I am trying to repair. I think by helping you, I could help myself. Feel free to call me or text me and maybe we can work together.
V/r
W V Rose
520 977 3992
Tucson, Az
LikeLike
Hi Wallace, Thanks for checking out our website! I appreciate your interest in lending a helping hand. Send me an email through our site and let’s chat about finding a time for you to come out.
LikeLike
We’re about to take on a similar project for our own house of mud. I’ll be returning to your site for more information. By the way, What is the square footage of the house you’re building? Looking great, looking forward to following the journey!
LikeLike
Hi Soraya! Thanks so much for your comment and question. The square footage is about 1250 sqft on the interior of the house. Given the thickness of the walls, the exterior is a total of 1600 sqft. As you can tell, the thickness of the walls decreases the space inside, particularly when a majority of the interior walls are also constructed of adobe (as is the case in our house).
Feel free to reach out to me through the contact page if you have any other questions. I’d be happy to answer other questions or offer advice to help you with your project. Are you in New Mexico?
LikeLike